前言:
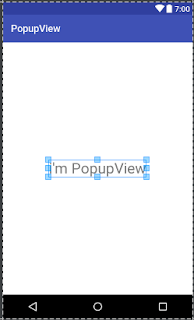
這就是PopupView的效果。
你可以在View上面設計自己想要做的任何事情。
跟Dialog一模一樣。
也許你會問那直接用Dialog就好了啊,幹嘛用PopupView?
是沒錯,但PopupView使用上比較直觀,個人比較愛這個(誤 根本是自己用習慣了)
程式碼實作:
先在xml裡面畫一個item,我把它命名為 popupview_item.xml (res/layout/popupview_item.xml)
popupview_item.xml
<?xml version="1.0" encoding="utf-8"?>
<RelativeLayout xmlns:android="http://schemas.android.com/apk/res/android"
    android:layout_width="match_parent"
    android:layout_height="match_parent"
    android:background="@android:color/white"
    android:orientation="vertical">

    <TextView
        android:layout_width="wrap_content"
        android:layout_height="wrap_content"
        android:layout_centerInParent="true"
        android:text="i'm PopupView"
        android:textSize="30dp" />
</RelativeLayout>
之後再main_activity內加一個Button,讓我們能呼叫PopupView
main_activity.xml
<?xml version="1.0" encoding="utf-8"?>
<RelativeLayout
    xmlns:android="http://schemas.android.com/apk/res/android"
    xmlns:tools="http://schemas.android.com/tools"
    android:id="@+id/main_activity"
    android:layout_width="match_parent"
    android:layout_height="match_parent"
    tools:context="com.chat.a015865.popupview.MainActivity">

    <Button
        android:id="@+id/button_popup"
        android:layout_width="wrap_content"
        android:layout_height="wrap_content"
        android:text="popup" />
</RelativeLayout>
讓我們回到MainActivity.java
       import android.app.Activity;
import android.content.Context;
import android.graphics.Bitmap;
import android.graphics.drawable.BitmapDrawable;
import android.os.Bundle;
import android.os.IBinder;
import android.support.v7.app.AppCompatActivity;
import android.view.Gravity;
import android.view.View;
import android.view.ViewGroup;
import android.view.WindowManager;
import android.view.inputmethod.InputMethodManager;
import android.widget.Button;
import android.widget.PopupWindow;
import android.widget.RelativeLayout;

public class MainActivity extends AppCompatActivity {
    private Activity mActivity;
    private PopupWindow mQuestionPopupWindow;
    private View rootView;
    private Button mButton;

    @Override
    protected void onCreate(Bundle savedInstanceState) {
        super.onCreate(savedInstanceState);
        setContentView(R.layout.activity_main);
        mActivity = this;
        initView();
        initSet();
        initListener();


    }

    private void initView() {
        mButton = (Button) findViewById(R.id.button_popup);
    }

    private void initSet() {

    }

    private void initListener() {
        mButton.setOnClickListener(new View.OnClickListener() {
            @Override
            public void onClick(View view) {
                PopupView();
            }
        });
    }


    private void PopupView() {
        //隱藏鍵盤(mActivity是你當前的activity)
        IBinder mIBinder = null;
        if (mActivity.getCurrentFocus() != null) {
            mIBinder = mActivity.getCurrentFocus().getWindowToken();
        }

        InputMethodManager mInputMethodManager = (InputMethodManager) getSystemService(Context.INPUT_METHOD_SERVICE);
        mInputMethodManager.hideSoftInputFromWindow(mIBinder, InputMethodManager.HIDE_NOT_ALWAYS);

        //創造PopupView(popupview_item是你要顯示在View上的xml)
        final ViewGroup nullParent = null;
        View popupView = getLayoutInflater().inflate(R.layout.popupview_item, nullParent);

        //設定PopupView
        mQuestionPopupWindow = new PopupWindow(popupView, RelativeLayout.LayoutParams.MATCH_PARENT, RelativeLayout.LayoutParams.WRAP_CONTENT, true);
        mQuestionPopupWindow.setTouchable(true);
        mQuestionPopupWindow.setOutsideTouchable(true);
        mQuestionPopupWindow.setBackgroundDrawable(new BitmapDrawable(getResources(), (Bitmap) null));
        mQuestionPopupWindow.setSoftInputMode(WindowManager.LayoutParams.SOFT_INPUT_ADJUST_RESIZE);

        //設定rootView 讓PopupView在rootView之上開啟
        rootView = getLayoutInflater().inflate(R.layout.activity_main, nullParent);
        mQuestionPopupWindow.showAtLocation(rootView, Gravity.BOTTOM, 0, 0);


        //設定透明度(popupview視窗外設為灰色)
        WindowManager.LayoutParams lp = mActivity.getWindow()
                .getAttributes();
        lp.alpha = 0.4f;
        mActivity.getWindow().addFlags(WindowManager.LayoutParams.FLAG_DIM_BEHIND);
        mActivity.getWindow().setAttributes(lp);

        mQuestionPopupWindow.setOnDismissListener(new PopupWindow.OnDismissListener() {

            // 在dismiss中恢复透明度
            public void onDismiss() {
                WindowManager.LayoutParams lp = mActivity.getWindow()
                        .getAttributes();
                lp.alpha = 1f;
                mActivity.getWindow().addFlags(WindowManager.LayoutParams.FLAG_DIM_BEHIND);
                mActivity.getWindow().setAttributes(lp);
            }
        });

    }
}
設定灰色的部分非必要,在這邊是為了模擬Dialog效果/*
*.showAtLocation(rootView, Gravity.BOTTOM, 0, 0); 此行是執行這PopupView的方法
*rootView 是popupView要顯示的基底View
*Gravity.BOTTOM 是你要讓popupView顯示的位址
**/
到這邊你就能完整的複製出PopupView的效果了。
Demo:https://drive.google.com/open?id=0Byk75IYx-dKXZkV5R1FBOGQ0Wm8
Demo完成品─
故障排除:
但最近在Android 7.0 和Android 7.1 大量出現PopupWindow跑位、無法使用的災情。
我也是受害者之一。
我也是受害者之一。
這邊提供幾個解決方法:
http://www.itwendao.com/article/detail/307320.html
https://code.google.com/p/android/issues/detail?id=221001
http://www.itwendao.com/article/detail/307320.html
https://code.google.com/p/android/issues/detail?id=221001
關鍵字打PopupWindow 7.0 or 7.1 就一大堆。這邊就不再贅述。
但我使用以上方法,7.0修好了 7.1上卻不能!
7.1弄好了,又換7.0有問題。
一氣之下我直接用Dialog取代了PopupWindow。
但我使用以上方法,7.0修好了 7.1上卻不能!
7.1弄好了,又換7.0有問題。
一氣之下我直接用Dialog取代了PopupWindow。
但不管怎麼改都會有個問題,Dialog沒辦法滿版,我研究了一陣子就往Theme和xml去調整。
先往res/values/colors 和 res/values/styles裡面添加顏色和theme
<color name="transparent_background">#50000000</color>
這行是半透明的色碼
res/values/styles
<style name="full_screan_dialog">
    <item name="android:windowBackground">@color/transparent_background</item>
    <item name="android:windowIsTranslucent">true</item>
    <item name="android:windowContentOverlay">@null</item>
    <item name="android:windowNoTitle">false</item>
    <item name="android:windowIsFloating">false</item>
    <item name="android:backgroundDimEnabled">false</item>
</style>
讓我們回到MainActivity.java
修改popupView這個方法內的東西,把有關PopupWindow的東西都砍掉,讓我們換成Dialog
  private void PopupView() {
        //隱藏鍵盤(mActivity是你當前的activity)
        IBinder mIBinder = null;
        if (mActivity.getCurrentFocus() != null) {
            mIBinder = mActivity.getCurrentFocus().getWindowToken();
        }
        InputMethodManager mInputMethodManager = (InputMethodManager) getSystemService(Context.INPUT_METHOD_SERVICE);
        mInputMethodManager.hideSoftInputFromWindow(mIBinder, InputMethodManager.HIDE_NOT_ALWAYS);
        //創造PopupView(popupview_item是你要顯示在View上的xml)
        final ViewGroup nullParent = null;
        View popupView = getLayoutInflater().inflate(R.layout.popupview_item, nullParent);
        AlertDialog.Builder builder = new AlertDialog.Builder(mActivity, R.style.full_screan_dialog);
        builder.setView(popupView);
        final AlertDialog dialog = builder.create();
        Window dialogWindow = dialog.getWindow();
        WindowManager.LayoutParams lp = dialogWindow.getAttributes();
        dialogWindow.setGravity(Gravity.BOTTOM);
        dialogWindow.setAttributes(lp);
        dialog.show();
    }
大功告成囉!
但你會發現Dialog飄在上面,這就是和PopupView不同處了。
此時我們要修改一下原本的popupview_item.xml
讓他能符合我們的期待。
popupview_item.xml
<?xml version="1.0" encoding="utf-8"?>
<RelativeLayout xmlns:android="http://schemas.android.com/apk/res/android"
    android:layout_width="match_parent"
    android:layout_height="match_parent"
    android:background="@android:color/white"
    android:orientation="vertical">

    <RelativeLayout
        android:layout_width="match_parent"
        android:layout_height="wrap_content">

        <LinearLayout
            android:layout_width="match_parent"
            android:layout_height="wrap_content"
            android:layout_alignParentBottom="true"
            android:layout_centerHorizontal="true"
            android:background="@android:color/white"
            android:gravity="center">

            <TextView
                android:layout_width="wrap_content"
                android:layout_height="wrap_content"
                android:layout_centerInParent="true"
                android:text="i'm PopupView"
                android:textSize="30dp" />
        </LinearLayout>
    </RelativeLayout>

</RelativeLayout>
讓程式跑跑看吧!和PopupWindow一樣的效果出來囉。
如果有問題再讓我知道,我會做修正。
下班囉!
Demo:
https://drive.google.com/open?id=0Byk75IYx-dKXdllUSlZUaC1oTEk


沒有留言:
張貼留言