show code block

顯示具有 Android方法 標籤的文章。 顯示所有文章

2018年6月28日 星期四

Anroid元件(LocalBroadcastManager) — fragment刷新

前言:


fragment刷新對很多人來說是個坑。

不管fragment刷新 fragment
還是fragment 刷新 activity
或是activity 刷新 fragment

都可以用,萬用

有人應該會有疑問,這不是廣播嗎?
如果我參數設的跟別人一樣,不就會喚起我這個app了?

但仔細看他的元件名稱前方有個Local,應該就不擔心了吧。他只在你app內運作。
當你銷毀fragment 或是 activity時,註銷它就可以了。

開始之前如果對FragmentPagerAdapter、ViewPager不熟,可以先參考一下這篇。
http://nikeru8.blogspot.com/2017/11/androidfragmentpageradapterviewpager.html


重點程式碼:


 //參數
    protected LocalBroadcastManager broadcastManager;


 //接收廣播 (信件 然後你要 do something)
    private BroadcastReceiver mReceiver = new BroadcastReceiver() {
        @Override
        public void onReceive(final Context context, Intent intent) {
            // 想像成從遠方寄來的信,可以是任何東西
            String action = intent.getStringExtra("changeSomething");
            if ("changeText".equals(action)) {
                new Handler().post(new Runnable() {
                    @Override
                    public void run() {
                        //do something
                        text_change.setText("你按了我~!!我刷新囉!");
                    }
                });
            }
        }
    };

    //註冊廣播 (你家的信箱)
    private void registerReceiver() {
        broadcastManager = LocalBroadcastManager.getInstance(getActivity());
        IntentFilter intentFilter = new IntentFilter();
        intentFilter.addAction("changeFragment");
        broadcastManager.registerReceiver(mReceiver, intentFilter);
    }


    //呼叫刷新畫面(寄件人)
    private void refreshData() {
        //指定要刷新的頁面給intent (
        Intent intent = new Intent("changeFragment");
        //要帶過去的參數
        intent.putExtra("changeSomething", "changeText");
        LocalBroadcastManager.getInstance(activity).sendBroadcast(intent);
    }


     //離開fragment後,消滅廣播 (搬家後,信箱地址換掉)
     @Override
    public void onDetach() {
        super.onDetach();
        broadcastManager.unregisterReceiver(mReceiver);
    }

    //註冊廣播 (蓋成房子後,買一個信箱) 
    @Override
    public void onCreate(@Nullable Bundle savedInstanceState) {
        super.onCreate(savedInstanceState);
        registerReceiver();
    }


這邊解釋一下,可以想像成fragment是一棟房子,你要寄信過去。
房子-fragment
信箱-registerReceiver()
寄件人-refreshData()
信件-mReceiver

有了房子(fragment)就必須有信箱(registerReceiver())才能收信,所以要在房子內蓋一個信箱。

當寄件人(refreshData())寄出了信,就會投地到信箱(registerReceiver()),然後你可以開啟信件(mReceiver)收到任何東西、做任何事。

夠簡單吧。


就不全部貼出來了,直接看代碼吧。


github:https://github.com/nikeru8/refreshFragment


2018年4月12日 星期四

Android方法 — 使用相機的正確姿勢(一)

前言:


這裡來實作相機的使用。

7.0牛扎糖官方改過權限,所以造成7.0以下會有FileUriExposedException的風險

這邊讓你迎刃而解


文獻來自官方檔案:
https://developer.android.com/training/camera/photobasics.html#TaskScalePhoto


實作:

先講一下要動到的地方


先在AndroidManifest.xml內給權限吧
 
<manifest>
...
      <uses-feature android:name="android.hardware.camera"
                  android:required="true" />
...
</manifest>

在上述的程式中,android:required=”true”可以判斷使用者的手機裝置是否有相機。
假設我們改成false,我們就必須透過寫code的方式由我們自己去確認。

讓我們來開相機吧
處理開到系統相機Intent的部分
 
private static final int REQUEST_CAPTURE_IMAGE = 100;

private void openCameraIntent() {
    Intent pictureIntent = new Intent(
                              MediaStore.ACTION_IMAGE_CAPTURE
                           );
    if(pictureIntent.resolveActivity(getPackageManager()) != null) { 
           startActivityForResult(pictureIntent,
                              REQUEST_CAPTURE_IMAGE);
    }
}

我們再來處理拍完照後,回來App的畫面處理
 
@Override
protected void onActivityResult(int requestCode, int resultCode,
                                              Intent data) {
    if (requestCode == REQUEST_CAPTURE_IMAGE && 
                              resultCode == RESULT_OK) {
        if (data != null && data.getExtras() != null) {
        Bitmap imageBitmap = (Bitmap) data.getExtras().get("data");
        mImageView.setImageBitmap(imageBitmap);
        }
    }
}

簡單的拍照,返回照片就完成囉!!

下載Demo:https://github.com/nikeru8/CameraDemo/commits/master


但上面只是做好看的,因為並沒有『儲存』這個動作。

拿上面的程式碼拍完照後,會發現沒有在相簿裡出現!?

當然啊,你又沒寫XD

接下來你必須寫一個存入系統的方法

一樣先加入權限吧!
manifests內加入存入權限
 
我以為要存儲權限,但原生的相機貌似不用。(而且這篇我也忘了加入呼叫權限的code XD


現在讓我們創建一個方法,創立文件名稱“日期_檔名”,把拍下來的照片寫入外部的檔案目錄內。
 
String imageFilePath;
private File createImageFile() throws IOException {
    String timeStamp = 
         new SimpleDateFormat("yyyyMMdd_HHmmss", 
                      Locale.getDefault()).format(new Date());
    String imageFileName = "IMG_" + timeStamp + "_";
    File storageDir =  
                getExternalFilesDir(Environment.DIRECTORY_PICTURES);
    File image = File.createTempFile(
                    imageFileName,  /* prefix */
                    ".jpg",         /* suffix */
                    storageDir      /* directory */
    );

    imageFilePath = image.getAbsolutePath();
    return image;
}


上面的方法已經寫好了圖片儲存的地點,接下來開始存圖片了。
把創建資料夾的路徑帶給相機,並開啟系統資料夾!
下面複寫了剛剛上面開啟相機的方式
 
private static final int REQUEST_CAPTURE_IMAGE = 100;

private void openCameraIntent() {
        Intent pictureIntent = new Intent(
                MediaStore.ACTION_IMAGE_CAPTURE);
        if (pictureIntent.resolveActivity(getPackageManager()) != null) {
            //創建一個資料夾去存圖片
            File photoFile = null;
            try {
                photoFile = createImageFile();
            } catch (IOException ex) {
                //當創建資料夾失敗...
            }

            //當創建的資料夾不為null直,把創建資料夾的路徑帶給相機,並開啟系統資料夾
            if (photoFile != null) {
                Uri photoURI = FileProvider.getUriForFile(this, "com.example.android.provider", photoFile);
                pictureIntent.putExtra(MediaStore.EXTRA_OUTPUT,
                        photoURI);
                startActivityForResult(pictureIntent,
                        REQUEST_CAPTURE_IMAGE);
            }
        }
    }


仔細看一下上述的程式碼,你一定會發現!“com.example.android.provider"是哪來的?在API等級 24以上的手機,都需要使用FileProvider去和你app內的manifest File 做連結。

讓我們開始FileProvider的步驟吧!
manifest內加入provider 
 
<application>
   ...
   <provider
        android:name="android.support.v4.content.FileProvider"
        android:authorities="${applicationId}.provider"
        android:exported="false"
        android:grantUriPermissions="true">
        <meta-data
            android:name="android.support.FILE_PROVIDER_PATHS"
            android:resource="@xml/file_paths">
        </meta-data>
    </provider>
    ...
</application>

發現${applicationId}.provider 了嗎?這個就是串聯剛剛的“com.example.android.provider"

直接把 ${applicationId}改成你App的Id名稱,這邊拿我的專案當範例


這兩邊的名稱要是一樣的,之後會長這樣
android:authorities="com.hello.kaiser.startcamera.provider"

發現紅色的地方了嗎?
“@xml/file_paths”
這邊就要自己創建了。
資料夾創建在res下面
變成


之後創建名為file_paths的xml檔案
 
<?xml version="1.0" encoding="utf-8"?>
<paths xmlns:android="http://schemas.android.com/apk/res/android">
    <external-path name="my_images"
        path="Android/data/com.example.package.name/files/Pictures" />
</paths>

上述程式碼中的path對應的就是剛剛上面寫得codegetExternalFilesDir()』的部分,也是你存到指定環境Environment.DIRECTORY_PICTURES的地方。

所以path必須做更改。

同樣拿我的專案舉例子,path就會改成
path="Android/data/com.hello.kaiser.startcamera/files/Pictures" 
長這樣子。

就差不多完成囉!

此時,拍完照片 > 返回你的app,就剩下顯示影像的工作了。

是寫在onActivityResult的地方!
onActivityResult(int requestCode, int resultCode, Intent data)
但又跟我們一開始寫的方式不一樣,此時帶回來的data會為nulll,所以判斷onActivityResult的部分只需要判斷requestCode是否為我們剛剛帶入的REQUEST_CAPTURE_IMAGE就行了,剛剛在上面提過獲取了imageFilePath路徑的方法。

現在直接在onActivityReslut內調用
 
@Override
    protected void onActivityResult(int requestCode, int resultCode, Intent data) {
        if (requestCode == REQUEST_CAPTURE_IMAGE && resultCode == RESULT_OK) {
            setPic();
        }
    }

    private void setPic() {
        // 獲取你在actiivity_layout地方的ImageView大小
        int targetW = mImageView.getWidth();
        int targetH = mImageView.getHeight();

        //獲取剛剛拍照圖片的大小
        BitmapFactory.Options bmOptions = new BitmapFactory.Options();
        bmOptions.inJustDecodeBounds = true;
        BitmapFactory.decodeFile(imageFilePath, bmOptions);
        int photoW = bmOptions.outWidth;
        int photoH = bmOptions.outHeight;

        //修改你要顯示圖片的尺寸大小
        int scaleFactor = Math.min(photoW / targetW, photoH / targetH);

        //使用Bitmap size去調整ImageView內顯示的圖片
        bmOptions.inJustDecodeBounds = false;
        bmOptions.inSampleSize = scaleFactor;
        bmOptions.inPurgeable = true;
        Bitmap bitmap = BitmapFactory.decodeFile(imageFilePath, bmOptions);

        //顯影像
        mImageView.setImageBitmap(bitmap);
    }

可以開啟你的程式,試著拍照吧。
會存在手機裡面囉!

onActivityReslut內可以使用更簡潔的方式,使用Glide

直接
 
Glide.with(this).load(imageFilePath).into(mImageView);

Glide介紹及使用方式:
http://nikeru8.blogspot.tw/2017/03/third-party-frescopicasso.html
官方:
https://github.com/bumptech/glide

需要注意的事情是,目前的第三方套件,套用方式已經改變
請在你的Gradle內加入
 
repositories {
  mavenCentral()
  google()
}

dependencies {
  implementation 'com.github.bumptech.glide:glide:4.7.1'
  annotationProcessor 'com.github.bumptech.glide:compiler:4.7.1'
}

這是在android3.0之後的改變

有問題請提出吧。

你的問題會是我創作很大的動力!

Demo:https://github.com/nikeru8/CameraDemo


心得:

之後還寫了一篇
客製化相機(二) 關於證件照的。

請參閱囉


2018年4月11日 星期三

Android方法(過濾Log) — Filter content in ERRORLOG

前言:


新一點版本的手機會發現,Log會跳出很多不大相干的訊息,大多都是手機底層自己的Log。

低階一點的手機就沒這問題。


過濾:


不囉唆了

^(?!.*(AAA)).*$

就是長這樣
中間的AAA就是你要過濾的訊息。


使用:

接下來看圖說故事


在上圖中,如果你想過濾TAGOpenGLRendererLog
^(?!.*(OpenGLRenderer)).*$


那如果我想過濾複數的Log怎麼辦?

那就用『 | 』這個符號吧
^(?!.*(OpenGLRenderer|eglCodecCommon|zygote)).*$

上面這樣可以同時過濾這三種TAGLog


就可以把Log內容用得像以前一樣乾淨囉!


總結:

這次也沒啥好總結的,就上面那麼簡單,突然想到一件事情想分享一下。

今天的總結突然想講一下徐曉東MMA狂人去年大戰太極永春高手的事情。
http://news.ltn.com.tw/news/world/breakingnews/2075960

我和徐曉冬的想法其實是一致的, 在這年代中國武術就真的是打養身的,你學了太極或是永春,說穿了就只是能打贏一般沒練家子的人而已吧。

 這讓我想到萬維綱的專欄中 曾這樣講過:
因為這是一個充分競爭,充分交流的時代。
只有競爭不充分的領域才有“風格”,比如我們看拳擊比賽、格鬥散打比賽,兩個選手的打法都非常相似 — 為什麼不像電影裡面一樣,一個用鐵砂掌、一個用螳螂拳呢?

 原因很明顯了,競爭交流不夠充分。

 如果武術門派之間充分交流,像現在職業足球這樣每週打一場聯賽,那麼不同打法之間很快就能分出高下,然後所有門派都會去學習最高級的那種打法。那麼最後結果就是所有人將都使用同樣的打法打比賽。

上述講的,也許就是今天MMA的打法。

再拿足球來說,三十年前足球是一個有明顯不同風格的運動,比如英格蘭愛打長傳衝釣,南美洲足球則主打腳法細膩,有時候可以看到一個人帶著球就可以過好幾個人,還有“歐洲拉丁派”。
但是今天我們看世界盃, 這些風格都不那麼明顯了。巴西隊也常追求快速推進,英格蘭也不打長傳衝釣了。當然你可以說某些人的打法就是與眾不同!但關鍵字是,不明顯

十幾年前圍棋大師也很講究『風格』。什麼流什麼流的,招數就那麼多,大家從小就學過,無非就是靈活運用,哪裡還談得上流派。


這就是充分競爭和交流的結果。

把這結果再來想想現在的手機,十年前的手機,各家品牌都有明顯的各自風格,外觀千奇百怪,有滑蓋式的、有折疊式的...應有盡有、百花齊放,而今天的手機正面全都是一塊黑屏。

拿現代MMA去和中國武術比,大概就是拿現在Iphone去和Nokia8810做比較一樣,同樣都是武功,一般人來打是肯定打得贏的,但都是練家子,中國武術練的就是Nokia8810,MMA練的就是Iphone。


2017年10月17日 星期二

Android方法(BuildType、Flavors、variants) — 簡易使用Flavors不同開發環境

前言:


如果你們公司需要不同的開發環境來做App測試,可以試試看這個。
flavors and buildType

這個的效果是什麼呢?

可以讓你把測試環境給分開


有什麼特別的嗎?

當然有特別,這三個App其實是同一個。
那為什麼要設成三個呢?
可以拿來當切換環境用,一個開發團隊內通常會有測試區lab和正式區。
 
如果在做檢查的時候,正式區和測試區切來切去非常的不方便。
你的程式大概會長這樣


每次切換都要重新選擇註解,再build一次。
中間等待的時間就白白浪費了,所以可以使用flavors來同時build起不同的開發環境。

這邊指讓你最簡易程度上的完成實作。
當然還有其他的玩法,詳情請見其他地方 or flavors and buildType


重點程式碼:

再gradle內


 defaultConfig {
       ...
        resValue "string", "app_label", "default_name"
        buildConfigField "String", "initAPI", "defult_value"
    }

productFlavors {
        dev {
            applicationId "com.example.branchOne"
            versionName "MyApp_dev"
            resValue "string","app_name","DEV_APP"
            buildConfigField "String", "initAPI", "\"https://www.google.com.tw/\""
        }
        RC {
            applicationId "com.example.branchTwo"
            versionName "MyApp_RC"
            resValue "string", "app_name", "RC_APP"
            buildConfigField "String", "initAPI", "\"開發環境一\""
        }
        PUB {
            applicationId "com.example.branchThree"
            versionName "My App"
            resValue "string","app_name","PUB_APP"
            buildConfigField "String", "initAPI", "\"正式版\""
        }
    }
 

上面的initAPI參數都應該是你們自己的api網址,在引號內的\"不能少

介紹一下裡面在幹嘛的
applicationId 每個app要獨立出來都必須有自己的androidId,如果androidId一樣系統會判定你為同一個APP

resValue 這是指會在下圖的地方看到dev pub rc 你設定的文字都會跑到這裡


再來是
buildConfig 看下圖,她會出現在和resValue很近的地方


再buildConfig內,程式碼會自動生成
public final class BuildConfig {
  public static final boolean DEBUG = Boolean.parseBoolean("true");
  public static final String APPLICATION_ID = "com.example.branchTwo";
  public static final String BUILD_TYPE = "debug";
  public static final String FLAVOR = "RC";
  public static final int VERSION_CODE = 1;
  public static final String VERSION_NAME = "MyApp_RC";
  // Fields from product flavor: RC
  public static final String initAPI = "開發環境一";
}


你會發現它自動生成了 initAPI,此時開發環境一就會是一串網址。

如何使用initAPI呢?
在要call這串網址的地方BuildConfig.initAPI就行了。
因為我們有在gradle > defaultConfig內設定初始值
如果你在productFlavors內沒有設定buildConfigField "String", "initAPI", "正式版"
會自動幫妳生成defult_value這個string


使用方式:


把畫面帶到android studio的左下角 有一個build Variants 在這裡切換你想要build的版本就行了。
當然他有分bugrelease版本
release版本有牽扯到 發布問題的key
單純demo就不說了。

然後如果你在程式內有寫DB,會需要做額外設定。

詳情請見
https://stackoverflow.com/questions/14368867/permission-denial-opening-provider

如果我有用到的話再做討論XD

有問題歡迎提出。

2017年9月12日 星期二

Android方法 — ScrollView內砍RecyclerView卡頓問題、資料顯示異常

前言:

最近的專題遇到這問題。
如果ScrollView內要顯示一個RecyclerView的話,因為兩個都有滾動效果。
滑起來就整個很卡、很慢、很鈍。
 就直接進入正題吧。


重點程式碼:


相信你也是因為遇到這個問題才進來的,我就不貼完整程式碼了。

1、滑動卡頓
因為兩個東西都會滑動,造成很卡,就乾脆把RecyclerView的滑動效果停掉吧!

  LinearLayoutManager llm = new LinearLayoutManager(mContext) {
            @Override
            public boolean canScrollVertically() {
                return false;
            }
        };
        llm.setOrientation(LinearLayoutManager.VERTICAL);
        mRecyclerView.setLayoutManager(llm);
 

只要阻止RecyclerView滑動問題就迎刃而解了。

2、資料顯示異常

如果你查過其他資料,你會發現資料如果太大筆,RecyclerView的Item 顯示會怪怪的。

我沒遇到這問題(可能是塞的資料量太少),但如果你有使用ScrollView+RecyclerView這個組合的話,還是乖乖加上去吧。

就是在RecyclerView外面再包一層RelativeLayout 問題就解決囉。


2017年7月17日 星期一

Android元件(SearchView、Filter) — SearchView應用、在RecyclerView內創建Filter

 前言:

 最近做到這個功能,在這裡做個紀錄。
以前我使用SearchBar的功能是我給後台值,後台直接給我收尋結果。
但如果使用到的收尋結果必須要前端(App端)實作呢?
這裡就教你如何前端做收尋應用。


重點程式碼:

重點都是圍繞在Filter
可以看一下官方文檔, 讓我們把畫面帶到Protected methods
在待會我們實作RecyclerView的時候繼承 Filterable 會用到getFilter() 方法,好讓我們在activity調用adapter時使用篩選。
還會再Adapter內實作一個自己的Filter,這時候會override複寫下方兩種方法。
performFiltering 執行篩選
publishResults 篩選結果

SearchView的部分,必須implements SearchView.OnQueryTextListener

Public methods

abstract booleanonQueryTextChange(String newText)
Called when the query text is changed by the user.
abstract booleanonQueryTextSubmit(String query)
Called when the user submits the query.

onQueryTextChange 當使用者改變searchview的字體時,call此方法。
onQueryTextSubmit 當使用者按下送出時,call此方法。


實作:

這裡提供 SearchView + ListView 的實作方法。
[AndroidStudio] 使用 SearchView 過濾列表資料 —
http://disp.cc/b/11-9ded

裡面的內容清楚明瞭。
如果有問題可以在這裡問。
我實作了一個demo:https://drive.google.com/open?id=0Byk75IYx-dKXWTUya0hKaWtXX3M

但ListView近期已經被RecyclerView代替了。
在RecyclerView內的adapter並沒有filter的方法,因此我們要在Adapter內實作。

提供一個SearchView + RecyclerView的方法
作者:Lipt0n
連結:http://www.jianshu.com/p/5078c7fec29e
來源:簡書
著作權歸作者所有。商業轉載請聯繫作者獲得授權,非商業轉載請註明出處。

此處就是在Adapter內實作Filterable並使用的很好範例。
等等我做的東西是實踐在這個上面的東西,就不提供DEMO了。


所有的收尋都拿String當例子,簡單明瞭!

但如果我要客製化呢?變成一個item的搜尋模式該怎麼辦呢?
這邊包含可以搜尋文字。
如果每個item的文字都不一樣,是可以分開收尋的。
只要你的文字內有關鍵字,都會跑在下面的結果內。
如圖:


完整程式碼:

先來看看 今日我們會動到的地方:


 因為會有網路下載圖片的功能,所以先在manifest加入Gilde。
如何加入這篇有提到
http://nikeru8.blogspot.tw/2017/03/third-party-frescopicasso.html
就不再贅述。

然後你還要一張default image,供給如果Gilde還沒下載完成時的預設圖片。
http://lmgtfy.com/?q=default_image 

這邊必須強調一下預設圖片和文字的重要性,如果RecyclerView讀取不到你的圖片或是文字,因為他內在的回收機制,他會去偷取其他item的圖片作為預設圖片。你也知道後果了。文不對題,或是錯位的問題就會絡繹不絕。


activity_main.xml

<?xml version="1.0" encoding="utf-8"?>
<LinearLayout xmlns:android="http://schemas.android.com/apk/res/android"
    xmlns:app="http://schemas.android.com/apk/res-auto"
    xmlns:tools="http://schemas.android.com/tools"
    android:layout_width="match_parent"
    android:layout_height="match_parent"
    android:orientation="vertical"
    tools:context="com.hello.kaiser.searchbar.MainActivity">

    <android.support.v7.widget.SearchView
        android:id="@+id/search_bar"
        android:layout_width="match_parent"
        android:layout_height="wrap_content" />

    <android.support.v7.widget.RecyclerView
        android:id="@+id/recycler_view"
        android:layout_width="match_parent"
        android:layout_height="match_parent"/>

</LinearLayout>


先看activity的佈局文件。
先把xml畫好畫滿。
item.xml
<LinearLayout xmlns:android="http://schemas.android.com/apk/res/android"
    android:layout_width="wrap_content"
    android:layout_height="wrap_content"
    android:orientation="horizontal">

    <ImageView
        android:id="@+id/image_view"
        android:layout_width="100dp"
        android:layout_height="100dp"
        android:padding="5dp" />

    <TextView
        android:id="@+id/text_view"
        android:layout_width="wrap_content"
        android:layout_height="wrap_content"
        android:layout_gravity="center_horizontal"
        android:gravity="center"
        android:textSize="30dp" />
</LinearLayout>
 

再來先把工具寫出來,我們要塞物件的DATA
DATA.java
 
public class Data  {
    private String title;
    private String imageUrl;

//    public Data(String title, String imageUrl) {
//        this.title = title;
//        this.imageUrl = imageUrl;
//        Log.d("ItemData", "CheckPoint imageUrl=" + imageUrl);
//    }

    public String getTitle() {
        return title;
    }

    public String getImageUrl() {
        return imageUrl;
    }

    public void setTitle(String title) {
        this.title = title;
    }

    public void setImageUrl(String imageUrl) {
        this.imageUrl = imageUrl;
    }

}

這裡我們要塞圖片和文字。

把我們MainActivity.java 全部補上吧。
public class MainActivity extends AppCompatActivity implements SearchView.OnQueryTextListener {

    
    //元件
    private android.support.v7.widget.SearchView searchView;
    private RecyclerView recyclerView;
    private ArrayList<Data> datalists = new ArrayList<>();
    private String[] urlList = null;
    private String[] titleList = null;
    private DataAdapter dataAdapter;


    @Override
    protected void onCreate(Bundle savedInstanceState) {
        super.onCreate(savedInstanceState);
        setContentView(R.layout.activity_main);
        initView();
        initSet();
    }

    /**
     *  這方法在activity所有畫面都完成之後,才會被call。
     *  之前我做的專案,有很多Crash案例都是因為畫面還沒完成,點擊事件就先放行,點擊後導致Crash。
     */
    @Override
    public void onWindowFocusChanged(boolean hasFocus) {
        super.onWindowFocusChanged(hasFocus);
        initListener();
    }

    /**
     *  init畫面
     */
    private void initView() {
        searchView = (android.support.v7.widget.SearchView) findViewById(R.id.search_bar);
        recyclerView = (RecyclerView) findViewById(R.id.recycler_view);
    }

    /**
     *  init設定
     */
    private void initSet() {
        //RecyclerView設定
        dataAdapter = new DataAdapter(this);
        LinearLayoutManager llm = new LinearLayoutManager(this);
        llm.setOrientation(LinearLayoutManager.VERTICAL);
        recyclerView.setLayoutManager(llm);
        searchView.setOnQueryTextListener(this);
        searchView.setIconifiedByDefault(false); //是否要點選搜尋圖示後再打開輸入框
        searchView.setFocusable(false);
        searchView.requestFocusFromTouch();      //要點選後才會開啟鍵盤輸入
        searchView.setSubmitButtonEnabled(false);//輸入框後是否要加上送出的按鈕
        searchView.setQueryHint("請輸入android搜尋"); //輸入框沒有值時要顯示的提示文字

        //假資料設定
        urlList = new String[]{
                "http://www.jrtstudio.com/sites/default/files/ico_android.png",
                "https://developer.android.com/_static/images/android/touchicon-180.png",
                "http://cdn.bgr.com/2012/11/android-icon.jpg?quality=98&amp;strip=all",
                "http://www.fastbooting.com/uploads/5/5/9/9/55994511/1474140_orig.png",
                "http://www.pendidikan-diy.go.id/dinas_v4/img/up_down/Android.png",
                "https://www.android.com/static/2016/img/one/a1_andy_1x.png",
                "http://zdnet2.cbsistatic.com/hub/i/2016/04/22/a1ced73f-6628-4930-96f4-d224e1d3a707/8a43709ccee674396403ee99472e38f3/android-security-1.jpg",
                "https://unwire.pro/wp-content/uploads/2017/05/android-kotlin.png",
                "http://www.jrtstudio.com/sites/default/files/ico_android.png",
                "https://developer.android.com/_static/images/android/touchicon-180.png",
                "http://cdn.bgr.com/2012/11/android-icon.jpg?quality=98&amp;strip=all",
                "http://www.fastbooting.com/uploads/5/5/9/9/55994511/1474140_orig.png",
                "http://www.pendidikan-diy.go.id/dinas_v4/img/up_down/Android.png",
                "https://www.android.com/static/2016/img/one/a1_andy_1x.png",
                "http://zdnet2.cbsistatic.com/hub/i/2016/04/22/a1ced73f-6628-4930-96f4-d224e1d3a707/8a43709ccee674396403ee99472e38f3/android-security-1.jpg",
                "https://unwire.pro/wp-content/uploads/2017/05/android-kotlin.png",
        };
        titleList = new String[]{
                "手機:iphone7",
                "手機殼:犀牛盾",
                "手機:htc",
                "電腦:戴爾",
                "手機:samsung",
                "電腦:hp惠普",
                "電腦:惠普",
                "電腦:蘋果電腦apple",
                "手機:sony",
                "手機:samsung s8",
                "手機:asus",
                "電腦:Auser宏碁電腦",
                "手機、電腦:微軟",
                "手機:oppo 蕩漾款",
                "手機:小米",
                "電腦:聯想",
        };

        //兩筆假資料size()一樣才進入迴圈
        if (titleList.length == urlList.length)
            for (int i = 0; i &lt; (urlList.length); i++) {
                Data data = new Data();//製作單筆資料
                data.setTitle(titleList[i]);
                data.setImageUrl(urlList[i]);
                datalists.add(data);//把單筆資料加入陣列
            }

        dataAdapter.setData(datalists);//把陣列塞入adapter
        recyclerView.setAdapter(dataAdapter);//把adapter塞入recyclerview
    }


    /**
     *  點擊事件
     */
    private void initListener() {

    }

    /**
     *  複寫implements SearchView.OnQueryTextListener 的方法
     */
    @Override
    public boolean onQueryTextSubmit(final String query) {
        return false;
    }

    @Override
    public boolean onQueryTextChange(final String newText) {
        //塞選 我們寫在adapter內
        dataAdapter.getFilter().filter(newText);
        return false;
    }
}

重頭戲Adapter
DataAdapter.java
class DataAdapter extends RecyclerView.Adapter<DataAdapter.dataHolder> implements Filterable {

    private final static String TAG = DataAdapter.class.getSimpleName();

    //元件
    private Context context;
    private ArrayList<data> datalists;//是會變動的陣列,用來顯示正個recyclerView的資料
    private ArrayList<data> filterDatas;//固定陣列,用來和filter比對用的。
    private MyFliter myFliter;//讓mainActivity能使用adapter呼叫篩選功能

    //建構子
    public DataAdapter(Context context) {
        this.context = context;
    }

    //implements Filterable的必定覆寫的方法,讓我們在activity內能呼叫他
    @Override
    public Filter getFilter() {
        if (myFliter == null) {
            myFliter = new MyFliter();
        }
        return myFliter;
    }

    class dataHolder extends RecyclerView.ViewHolder {
        private ImageView imageView;
        private TextView textView;

        public dataHolder(View itemView) {
            super(itemView);
            imageView = (ImageView) itemView.findViewById(R.id.image_view);
            textView = (TextView) itemView.findViewById(R.id.text_view);
        }
    }

    //讓我們在activity內能讀取或更新adapter內data的資料
    public void setData(ArrayList<data> datalists) {
        this.datalists = datalists;
        filterDatas = datalists;
        notifyDataSetChanged();
    }

    @Override
    public DataAdapter.dataHolder onCreateViewHolder(ViewGroup parent, int viewType) {
        View view = LayoutInflater.from(parent.getContext()).inflate(R.layout.item, parent, false);
        dataHolder dh = new dataHolder(view);
        return dh;
    }

    @Override
    public void onBindViewHolder(DataAdapter.dataHolder holder, int position) {
        Glide.with(context)
                .load(datalists.get(position).getImageUrl())
                .placeholder(R.drawable.default_image)
                .into(holder.imageView);

        if (!TextUtils.isEmpty(datalists.get(position).getTitle()))
            holder.textView.setText(datalists.get(position).getTitle());
        else
            holder.textView.setText("暫無資料");
    }

    @Override
    public int getItemCount() {
        return datalists == null ? 0 : datalists.size();
    }

    //實作自己的篩選Filter
    class MyFliter extends Filter {
        @Override
        protected FilterResults performFiltering(CharSequence filterContent) {
            ArrayList<data> filterData = new ArrayList&lt;&gt;();
            //先判斷filterContent是不是null才進入
            if (filterContent != null &amp;&amp; filterContent.toString().trim().length() &gt; 0) {
                Log.d(TAG, "確認是否為空值。 filterData.size = " + filterData.size());
                //這回圈是在判斷你輸入的文字(filterContent)是否有在filterDatas陣列內有相關的文字,逐條搜尋。
                for (int i = 0; i &lt; filterDatas.size(); i++) {
                    String content = filterDatas.get(i).getTitle();
                    Log.d(TAG, "確認是否進入for迴圈 content = " + content);
                    if (content.contains(String.valueOf(filterContent))) {
                        Log.d(TAG, "確認輸入文字是否相同。");
                        Data data = new Data();
                        data.setImageUrl(filterDatas.get(i).getImageUrl());
                        data.setTitle(filterDatas.get(i).getTitle());
                        filterData.add(data);
                    }
                }
            } else {
                filterData = filterDatas;
                Log.d(TAG, "確認什麼都沒打 filterDatas = datalists = " + filterData.size());

            }
            FilterResults filterResults = new FilterResults();
            filterResults.count = filterData.size();
            filterResults.values = filterData;
            Log.d(TAG, "final size = " + filterResults.count);
            return filterResults;
        }

        @Override
        protected void publishResults(CharSequence charSequence, FilterResults filterResults) {
            datalists = (ArrayList<data>) filterResults.values;
            if (filterResults.count &gt; 0) {
                notifyDataSetChanged();
            } else {
                Data data = new Data();
                data.setTitle("沒有結果");
                datalists.add(data);
                notifyDataSetChanged();
            }
        }
    }
}
MyFliter 這方法內強破複寫兩種方法
performFiltering 執行篩選
publishResults 篩選結果
performFiltering
1、我先判斷在SearchView內的有無輸入任何文字(是否為null)
2、在寫一個for迴圈,把所有進入adatper陣列資料內的title String做比對,如果有相同的文字,就創建一個data物件,塞入你要篩選存放的ArrayList內。
3、 比對完之後把你篩選存放的ArrayList丟入FilterResults內。
publishFiltering
1、datalists是在adapter內會變動的陣列,用來顯示RecyclerView用的(filterDatas為固定陣列,用來和filter做資料比對)
2、 把剛剛在performFiltering抓取到的filterResults匯到datalists內。用以顯示recyclerView
3、假如陣列大於0,就notifyDataSetChanged刷新RecyclerView。


DEMO: https://drive.google.com/open?id=0Byk75IYx-dKXNXEzdzlzUEwzc3M

2017年5月30日 星期二

Android權限 ─ 調整螢幕亮度、特殊權限 android.permission.WRITE_SETTINGS

 前言:

之前調整權限的方式請看這裡
這次調用權限的方式比較不一樣。看圖吧!


權限使用:

請參考這篇:
https://yanlu.me/android-m6-0-permission-chasm/
以下全部複製。
這是WRITE_SETTINGS權限的使用方式。
記得先在manifest內增加權限

<uses-permission android:name="android.permission.WRITE_SETTINGS"/>


/**
 * An app can use this method to check if it is currently allowed to write or modify system
 * settings. In order to gain write access to the system settings, an app must declare the
 * {@link android.Manifest.permission#WRITE_SETTINGS} permission in its manifest. If it is
 * currently disallowed, it can prompt the user to grant it this capability through a
 * management UI by sending an Intent with action
 * {@link android.provider.Settings#ACTION_MANAGE_WRITE_SETTINGS}.
 *
 * @param context A context
 * @return true if the calling app can write to system settings, false otherwise
 */
 if(!Settings.System.canWrite(this)){
      Intent intent = new Intent(Settings.ACTION_MANAGE_WRITE_SETTINGS,
                Uri.parse("package:" + getPackageName()));
      startActivityForResult(intent, REQUEST_CODE);
 } 
 
 
@Override
protected void onActivityResult(int requestCode, int resultCode, Intent data) {
    if (requestCode == REQUEST_CODE) {
        if (Settings.System.canWrite(this)) {
            //检查返回结果
            Toast.makeText(MainActivity.this, "WRITE_SETTINGS permission granted", Toast.LENGTH_SHORT).show();
        } else {
            Toast.makeText(MainActivity.this, "WRITE_SETTINGS permission not granted", Toast.LENGTH_SHORT).show();
        }
    }
}
 
其中比較需要注意的地方是Settings.System.canWrite這方法在太低版本的Android上面不適用。
調用會Crash。
所以我們稍加做了一些判斷。

 
if (Build.VERSION.SDK_INT > Build.VERSION_CODES.M) {//android6.0以上使用需要權限
                    if (!Settings.System.canWrite(context)) {//沒有給予權限的話Do Something
                        //跳轉畫面到權限頁面給使用者勾選
                        Intent intent = new Intent(Settings.ACTION_MANAGE_WRITE_SETTINGS,
                                Uri.parse("package:" + getPackageName()));
                        startActivityForResult(intent, 9487);
                    } else {//已有權限 Do Something
                        start_bRight();//開始調整螢幕
                    }

                } else {//android6.0以下可直接調用
                    start_bRight();//開始調整螢幕
                }

 @Override
    protected void onActivityResult(int requestCode, int resultCode, Intent data) {
        switch (requestCode) {
            case 9487:
                if (Build.VERSION.SDK_INT > Build.VERSION_CODES.M) {
                    if (Settings.System.canWrite(this)) {
                        start_bRight();//開始調整螢幕
                    } else {
                        Toast.makeText(MainActivity.this, "請給予權限。", Toast.LENGTH_SHORT).show();
                    }
                } else {
                    start_bRight();//開始調整螢幕
                }
                break;
        }
    }

使用
Build.VERSION.SDK_INT > Build.VERSION_CODES.M
來判斷是否Android的版本為SDK 23以上,如果是23以下就沒有權限問題,也可以順利調用Settings.System.canWrite方法。


調整亮度Code:

裡面帶有SeekBar參數。

    //調整螢幕亮度
    private void start_bRight() {

        //設定最大值
        SeekBar m_SeekBar = (SeekBar) findViewById(R.id.see_bar);
        m_SeekBar.setMax(255);

        //取得目前系統的亮度值
        int brightness = android.provider.Settings.System.getInt(getContentResolver(), android.provider.Settings.System.SCREEN_BRIGHTNESS, 255);
        Log.w(TAG, "亮度 素質" + brightness);

        //將亮度值 射定道系統中
        m_SeekBar.setProgress(brightness);

        //關閉自動調整亮度功能
        Settings.System.putInt(this.getContentResolver(), Settings.System.SCREEN_BRIGHTNESS_MODE, Settings.System.SCREEN_BRIGHTNESS_MODE_MANUAL);
        /*
         * @param cr要訪問的ContentResolver。
         * @param name要修改的設置的名稱。
         * @param value設置的新值。
         */


        //設定SeeBar的監聽事件
        m_SeekBar.setOnSeekBarChangeListener(new SeekBar.OnSeekBarChangeListener() {
            @Override
            public void onProgressChanged(SeekBar seekBar, int progress, boolean fromUser) {
                //觀察目前系統的亮度值
                int brightness = android.provider.Settings.System.getInt(getContentResolver(), android.provider.Settings.System.SCREEN_BRIGHTNESS, 255);
                Log.w(TAG, "觀察亮度 素質" + brightness);

                //針對App端的UI作為 螢幕亮度調整
                // (假設App端調整最暗,)
                Window localWindow = getWindow();
                WindowManager.LayoutParams localLayoutParams = localWindow.getAttributes();
                localLayoutParams.screenBrightness = progress / 255.0f;
                localWindow.setAttributes(localLayoutParams);

                //如果想改變整個系統的亮度
                //方法1:
//                Uri uri = android.provider.Settings.System.getUriFor("screen_brightness");
//                android.provider.Settings.System.putInt(context.getContentResolver(), getContentResolver(), progress);
//                context.getContentResolver().notifyChange(uri, null);

                //方法2:
                android.provider.Settings.System.putInt(getContentResolver(), android.provider.Settings.System.SCREEN_BRIGHTNESS, progress);

                /*補充:android.provider.Settings.System.putInt(參數1,參數2,參數3);
                *
                *參數1:需要一個ContentResolver ,所以getContentResolver()
                *參數2:其實就是一個字串,"screen_brightness",但是這個類別中已經有final String 位置在→ android.provider.Settings.System.SCREEN_BRIGHTNESS
                *參數3:設定的值
                *
                * */
            }

            @Override
            public void onStartTrackingTouch(SeekBar seekBar) {

            }

            @Override
            public void onStopTrackingTouch(SeekBar seekBar) {

            }
        });

    }
 
這裡還有另外一些調整亮度的方式。
如果你要進入畫面直接最亮可以嘗試以下方法
【Android開發經驗】與屏幕亮度調節相關的各種方法整理
public class SystemManager {  
  
    private Context mContext;  
    private static SystemManager sInstance;  
  
    private SystemManager(final Context context) {  
        mContext = context;  
    }  
  
    public static SystemManager init(final Context context) {  
        if (null == sInstance) {  
            sInstance = new SystemManager(context);  
        }  
        return sInstance;  
    }  
  
    public static SystemManager getInstance() {  
        return sInstance;  
    }  
  
    // 判斷是否是自動調光模式  
    public boolean isAutoBrightness() {  
        boolean automicBrightness = false;  
        try {  
            ContentResolver resolver = mContext.getContentResolver();  
            automicBrightness = Settings.System.getInt(resolver,  
                    Settings.System.SCREEN_BRIGHTNESS_MODE) == Settings.System.SCREEN_BRIGHTNESS_MODE_AUTOMATIC;  
        } catch (SettingNotFoundException e) {  
            e.printStackTrace();  
        }  
        return automicBrightness;  
    }  
  
    // 設置屏幕亮度  
    public void setBrightness(Activity activity, int brightness) {  
        WindowManager.LayoutParams lp = activity.getWindow().getAttributes();  
        lp.screenBrightness = Float.valueOf(brightness) * (1f / 255f);  
        activity.getWindow().setAttributes(lp);  
    }  
  
    // 保存屏幕亮度  
    public void saveBrightness(int brightness) {  
        ContentResolver resolver = mContext.getContentResolver();  
        Uri uri = android.provider.Settings.System  
                .getUriFor("screen_brightness");  
        android.provider.Settings.System.putInt(resolver, "screen_brightness",  
                brightness);  
        resolver.notifyChange(uri, null);  
    }  
  
    // 開啟自動調光模式  
    public void startAutoBrightness() {  
        ContentResolver resolver = mContext.getContentResolver();  
        Settings.System.putInt(resolver,  
                Settings.System.SCREEN_BRIGHTNESS_MODE,  
                Settings.System.SCREEN_BRIGHTNESS_MODE_AUTOMATIC);  
        Uri uri = android.provider.Settings.System  
                .getUriFor("screen_brightness");  
        resolver.notifyChange(uri, null);  
    }  
  
    // 關閉自動調光模式  
    public void stopAutoBrightness() {  
        ContentResolver resolver = mContext.getContentResolver();  
        Settings.System.putInt(resolver,  
                Settings.System.SCREEN_BRIGHTNESS_MODE,  
                Settings.System.SCREEN_BRIGHTNESS_MODE_MANUAL);  
        Uri uri = android.provider.Settings.System  
                .getUriFor("screen_brightness");  
        resolver.notifyChange(uri, null);  
    }  
  
    // 獲得當前屏幕亮度  
    public int getScreenBrightness() {  
        int nowBrightnessValue = 0;  
        try {  
            ContentResolver resolver = mContext.getContentResolver();  
            nowBrightnessValue = android.provider.Settings.System.getInt(  
                    resolver, Settings.System.SCREEN_BRIGHTNESS);  
        } catch (Exception e) {  
            e.printStackTrace();  
        }  
        return nowBrightnessValue;  
    }  
  
    // 設置光亮模式  
    public void setBrightnessMode(int mode) {  
        Settings.System.putInt(mContext.getContentResolver(),  
                Settings.System.SCREEN_BRIGHTNESS_MODE, mode);  
    }  
  
    // 獲得亮度模式  
    public int getBrightnessMode() {  
        try {  
            return Settings.System.getInt(mContext.getContentResolver(),  
                    Settings.System.SCREEN_BRIGHTNESS_MODE);  
        } catch (SettingNotFoundException e) {  
            return Settings.System.SCREEN_BRIGHTNESS_MODE_AUTOMATIC;  
        }  
    }  
    //調到最亮 0~255 最暗~最亮
    Settings.System.putInt(getContentResolver(), Settings.System.SCREEN_BRIGHTNESS, 255);
  
}  


Demo:
https://dl.dropboxusercontent.com/s/hcv9hqoaudd8wuk/ScreenBright.7z

2017年4月10日 星期一

改變strings.xml ─ String.format()的使用

實作:

strings.xml

 
 //
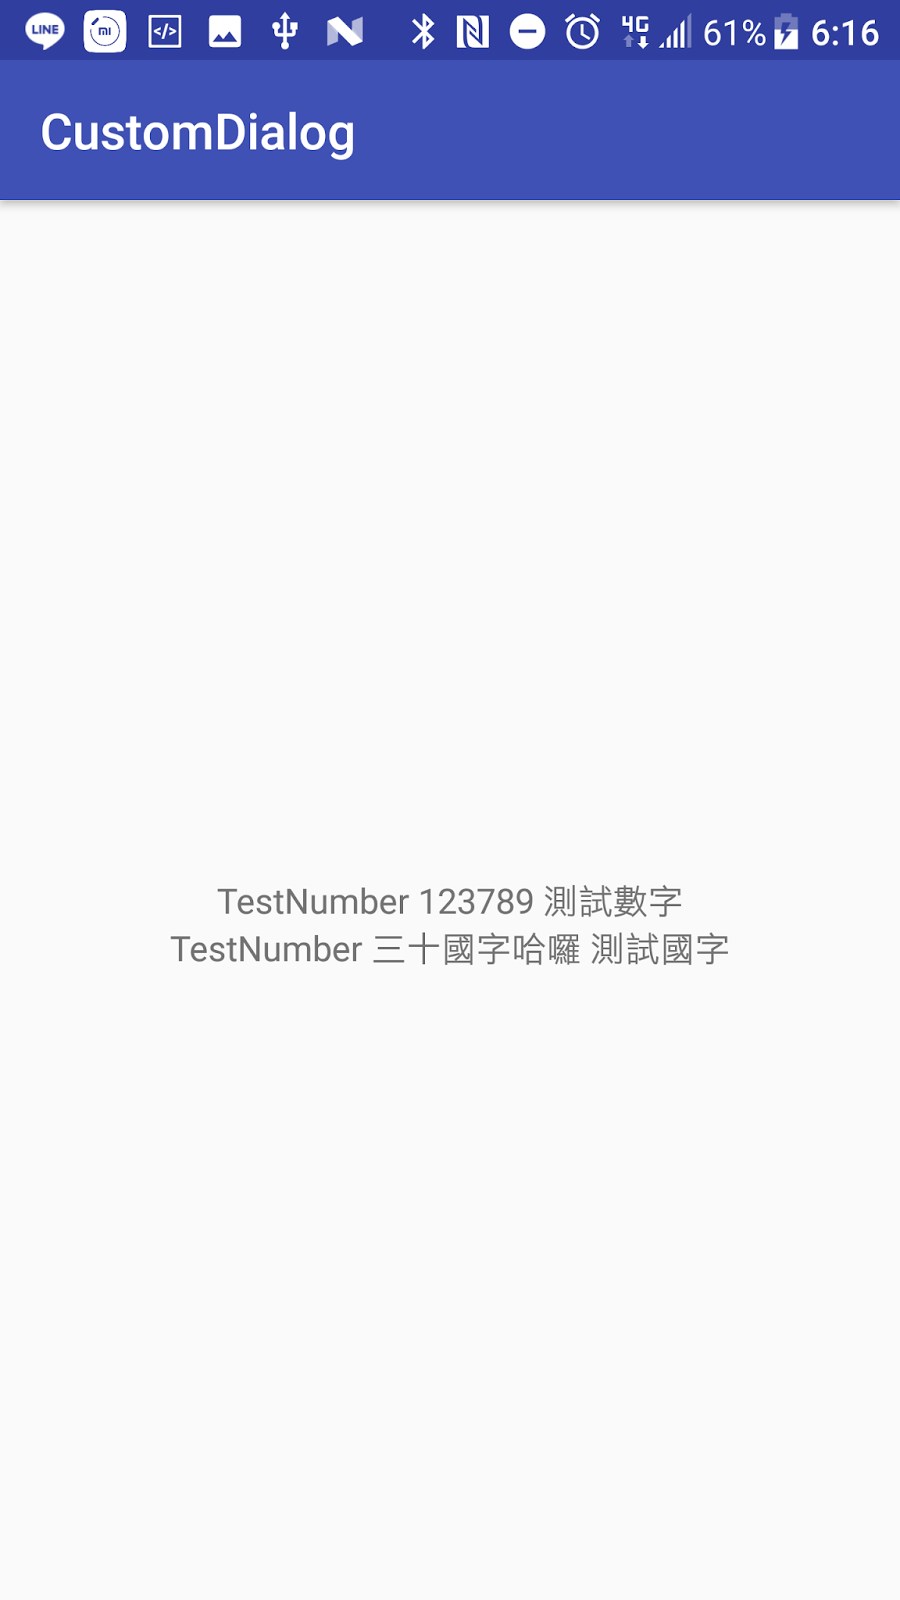
 <string name="Test_Number">TestNumber %1$d 測試數字</string>
 <string name="Test_Word">TestNumber %1$s 測試國字</string>


此時要如何在java內操作%1$d%1$s呢?

先來搞懂上述各代表什麼。

前面的%n代表是第幾個參數

%d(表示整數)
%f(表示浮點數)
%s(表示字符串)


 先畫xml,在xml內畫兩個TextView
activity_main.xml

activity_main.xml

<?xml version="1.0" encoding="utf-8"?>
<RelativeLayout xmlns:android="http://schemas.android.com/apk/res/android"
    xmlns:tools="http://schemas.android.com/tools"
    android:layout_width="match_parent"
    android:layout_height="match_parent"
    tools:context="com.chat.a015865.customdialog.MainActivity">
     
    <TextView
        android:id="@+id/textview"
        android:layout_width="wrap_content"
        android:layout_height="wrap_content"
        android:layout_centerInParent="true"
        android:onClick="onClickMe"
        android:text="Hello World!" />

    <TextView
        android:id="@+id/textViewtwo"
        android:layout_width="wrap_content"
        android:layout_height="wrap_content"
        android:layout_below="@+id/textview"
        android:layout_centerHorizontal="true"
        android:text="Hello Text Two" />

</RelativeLayout>


MainActivity.java

public class MainActivity extends AppCompatActivity {
    @Override
    protected void onCreate(Bundle savedInstanceState) {
        super.onCreate(savedInstanceState);
        setContentView(R.layout.activity_main);

        TextView textView = (TextView) findViewById(R.id.textview);
        TextView textviewtwo = (TextView) findViewById(R.id.textViewtwo);

        String message = getString(R.string.Test_Number);
        String messagetwo = getString(R.string.Test_Word);

        textView.setText(String.format(message, 123789));
        textviewtwo.setText(String.format(messagetwo, "三十國字哈囉"));

    }
}


/**
*String.format(strings,value);
*strings 是strings.xml內的字串參數(ex:TestNumber %1$d 測試數字)
*value 是你帶給%1$d的值
*/

實作完成畫面
實作完成畫面


簡易好懂:
http://blog.csdn.net/xiaoyaovsxin/article/details/8450056

詳細版本:
http://blog.csdn.net/lonely_fireworks/article/details/7962171

2017年3月22日 星期三

third-party元件(Youtube API) ─ Youtube API 簡易使用(二) 控制元件、移除SeekBar、自訂按鈕

前言:


今天來講一下YoutubePlay的控制方式。

想要自己控制PLAY、PAUSE按鈕,又或者想要自訂SeekBar。

這時候就必須要一個乾淨純粹的View ─

除了一個Time Bar 和點擊畫面上的Play、Pause外,是不是很乾淨的,很純粹。


其實也可以把所有控制按鈕都拿掉,所有的控制元件都自己設定,就像MixerBox一樣。

MixerBox就是自己控制所有元件的最好例子,單看畫面還不覺得這出自Youtube!

先讓我們看看Youtube官方文件。
https://developers.google.com/youtube/android/player/reference/com/google/android/youtube/player/YouTubePlayer.PlayerStyle

在裡面有一個mothed是專門控制Style的


YouTubePlayer.PlayerStyle

java.lang.Object
   ↳java.lang.Enum<E extends java.lang.Enum<E>>
   ↳com.google.android.youtube.player.YouTubePlayer.PlayerStyle

Overview

The different styles available for the player.

Summary

Enum values
YouTubePlayer.PlayerStyle.CHROMELESSA style that shows no interactive player controls.
YouTubePlayer.PlayerStyle.DEFAULTThe default style, showing all interactive controls.
YouTubePlayer.PlayerStyle.MINIMALA minimal style, showing only a time bar and play/pause controls.
Public methods
static YouTubePlayer.PlayerStylevalueOf(String name)
final static PlayerStyle[]values()


public static final YouTubePlayer.PlayerStyle CHROMELESS

A style that shows no interactive player controls.
這個風格完全移除和畫面的互動,所有東西都必須自訂。
ex:就如同MixerBox一樣,自訂所有畫面

public static final YouTubePlayer.PlayerStyle DEFAULT

The default style, showing all interactive controls.
正常版風格,保留了一切你在Youtube上面看的到的控制元件,包含點它們右下角的Youtube可直接跳轉到它們app觀看的原件。

public static final YouTubePlayer.PlayerStyle MINIMAL

A minimal style, showing only a time bar and play/pause controls.
最小簡化的風格,只保留TimeBar和螢幕上的播放和暫停控制元件。
ex:就如同我前言那張圖一樣,可以明顯看出pause暫停按鈕和下面的TimeBar


程式碼:

先前的程式碼請先參考:http://nikeru8.blogspot.tw/2017/03/androidyoutube-api-youtube-api.html

我們加在讀取成功後的方法內。

onInitializationSuccess


當然要讀取成功後控制這一切才有意義XDD
 @Override
    public void onInitializationSuccess(YouTubePlayer.Provider provider, YouTubePlayer youTubePlayer, boolean wasRestored) {
        Toast.makeText(this, "onInitializationSuccess!", Toast.LENGTH_SHORT).show();
        if (youTubePlayer == null) {
            Log.d("CheckPoint", "CheckPoint youtubePlayer == null");
            return;
        }
        // Start buffering
        if (!wasRestored) {
            Log.d("CheckPoint", "CheckPoint !wasRestored");
            youTubePlayer.cueVideo(VIDEO_ID);
        }
//        youTubePlayer.setPlayerStyle(YouTubePlayer.PlayerStyle.CHROMELESS);//移除全部控制按鈕
//        youTubePlayer.setPlayerStyle(YouTubePlayer.PlayerStyle.DEFAULT);//原版
        youTubePlayer.setPlayerStyle(YouTubePlayer.PlayerStyle.MINIMAL);//移除下面的控制按鈕
    }


這邊比較值得注意的是,使用PlayerStyle.CHROMELESS時,因為移除了全部的控制按鈕,你甚至不能按下Play按鈕,要請你自己添加控制元件囉。
不然就會像一張圖片一樣卡在那。


控制元件Code:

如上所述,先在onInitializationSuccess內上程式碼。

youTubePlayer.setPlayerStyle(YouTubePlayer.PlayerStyle.CHROMELESS);


再來改變main_activity.xml的布局

main_activity.xml

<?xml version="1.0" encoding="utf-8"?>
<RelativeLayout

    xmlns:android="http://schemas.android.com/apk/res/android"
    xmlns:tools="http://schemas.android.com/tools"
    android:layout_width="match_parent"
    android:layout_height="match_parent"
    tools:context="com.chat.a015865.youtube.MainActivity">

    <com.google.android.youtube.player.YouTubePlayerView
        android:id="@+id/player_view"
        android:layout_width="match_parent"
        android:layout_height="wrap_content" />

    <LinearLayout
        android:id="@+id/video_control"
        android:layout_width="match_parent"
        android:layout_height="wrap_content"
        android:layout_below="@+id/player_view"
        android:background="#444"
        android:gravity="center_vertical"
        android:orientation="horizontal"
        android:visibility="visible"
        android:weightSum="10"
        tools:layout_editor_absoluteX="84dp"
        tools:layout_editor_absoluteY="374dp">

        <ImageButton
            android:id="@+id/play_video"
            android:layout_width="0dp"
            android:layout_height="wrap_content"
            android:layout_margin="5dp"
            android:layout_weight="1"
            android:background="@null"
            android:src="@drawable/ic_play" />

        <ImageButton
            android:id="@+id/pause_video"
            android:layout_width="0dp"
            android:layout_height="wrap_content"
            android:layout_margin="5dp"
            android:layout_weight="1"
            android:background="@null"
            android:src="@drawable/ic_pause" />

        <SeekBar
            android:id="@+id/video_seekbar"
            android:layout_width="0dp"
            android:layout_height="wrap_content"
            android:layout_margin="10dp"
            android:layout_weight="6"
            android:max="100"
            android:progress="0" />

        <TextView
            android:id="@+id/play_time"
            android:layout_width="0dp"
            android:layout_height="wrap_content"
            android:layout_margin="5dp"
            android:layout_weight="2"
            android:text="--:--"
            android:textColor="@android:color/white" />
    </LinearLayout>
</RelativeLayout>


MainActivity.java

public class MainActivity extends YouTubeBaseActivity implements YouTubePlayer.OnInitializedListener, View.OnClickListener {


    public static final String API_KEY = "AIzaSyAPThx6WbAxjnX2En0qtf9OhD80tUcp380";

    //https://www.youtube.com/watch?v=
    public static final String VIDEO_ID = "qZIWO9TqvIA";

    private YouTubePlayer mYoutubePlayer;
    private View mPlayButtonLayout;
    private TextView mPlayTimeTextView;

    private Handler mHandler = null;
    private SeekBar mSeekBar;


    @Override
    protected void onCreate(@Nullable Bundle savedInstanceState) {
        super.onCreate(savedInstanceState);
        setContentView(R.layout.activity_main);

        final YouTubePlayerView mYoutubePlayerView = (YouTubePlayerView) findViewById(R.id.player_view);
        mYoutubePlayerView.initialize(API_KEY, this);
        initView();
        mPlayButtonLayout = findViewById(R.id.video_control);
        findViewById(R.id.play_video).setOnClickListener(this);
        findViewById(R.id.pause_video).setOnClickListener(this);

        mPlayTimeTextView = (TextView) findViewById(R.id.play_time);
        mSeekBar = (SeekBar) findViewById(R.id.video_seekbar);
        mSeekBar.setOnSeekBarChangeListener(mVideoSeekBarChangeListener);
        mHandler = new Handler();
    }

    private void initView() {

    }

    @Override
    public void onInitializationSuccess(YouTubePlayer.Provider provider, YouTubePlayer youTubePlayer, boolean wasRestored) {
        Toast.makeText(this, "onInitializationSuccess!", Toast.LENGTH_SHORT).show();
        mYoutubePlayer = youTubePlayer;
        if (youTubePlayer == null) {
            Log.d("CheckPoint", "CheckPoint youtubePlayer == null");
            return;
        }
        // Start buffering
        if (!wasRestored) {
            Log.d("CheckPoint", "CheckPoint !wasRestored");
            youTubePlayer.cueVideo(VIDEO_ID);
        }
        youTubePlayer.setPlayerStyle(YouTubePlayer.PlayerStyle.CHROMELESS);
//        youTubePlayer.setPlayerStyle(YouTubePlayer.PlayerStyle.DEFAULT);//原版
//        youTubePlayer.setPlayerStyle(YouTubePlayer.PlayerStyle.MINIMAL);//移除下面的控制按鈕

        youTubePlayer.setPlayerStateChangeListener(mPlayerStateChangeListener);//影片在run時的狀態
        youTubePlayer.setPlaybackEventListener(mPlaybacckEventListener);
    }

    YouTubePlayer.PlaybackEventListener mPlaybacckEventListener = new YouTubePlayer.PlaybackEventListener() {
        @Override
        public void onPlaying() {
            mHandler.postDelayed(runnable, 100);
            displayCurrentTime();
        }

        @Override
        public void onPaused() {
            mHandler.removeCallbacks(runnable);
        }

        @Override
        public void onStopped() {
            mHandler.removeCallbacks(runnable);
        }

        @Override
        public void onBuffering(boolean b) {

        }

        @Override
        public void onSeekTo(int i) {
            Log.d("CheckPoint", "CheckPoint i = " + i);
            mHandler.postDelayed(runnable, 100);
        }
    };
    YouTubePlayer.PlayerStateChangeListener mPlayerStateChangeListener = new YouTubePlayer.PlayerStateChangeListener() {
        @Override
        public void onLoading() {

        }

        @Override
        public void onLoaded(String s) {

        }

        @Override
        public void onAdStarted() {

        }

        @Override
        public void onVideoStarted() {
            displayCurrentTime();
        }

        @Override
        public void onVideoEnded() {

        }

        @Override
        public void onError(YouTubePlayer.ErrorReason errorReason) {

        }
    };

    @Override
    public void onInitializationFailure(YouTubePlayer.Provider provider, YouTubeInitializationResult youTubeInitializationResult) {
        Toast.makeText(this, "Failed to initialize.", Toast.LENGTH_LONG).show();
    }

    SeekBar.OnSeekBarChangeListener mVideoSeekBarChangeListener = new SeekBar.OnSeekBarChangeListener() {
        @Override
        public void onProgressChanged(final SeekBar seekBar, final int progress, boolean fromUser) {
            long lengthPlayed = (mYoutubePlayer.getDurationMillis() * progress) / 100;
            mYoutubePlayer.seekToMillis((int) lengthPlayed);
            seekBar.setProgress(progress);
        }

        @Override
        public void onStartTrackingTouch(SeekBar seekBar) {

        }

        @Override
        public void onStopTrackingTouch(SeekBar seekBar) {

        }
    };

    private void displayCurrentTime() {
        if (mYoutubePlayer == null) return;
        String formattedTime = formatTime(mYoutubePlayer.getDurationMillis() - mYoutubePlayer.getCurrentTimeMillis());
        mPlayTimeTextView.setText(formattedTime);
    }

    private String formatTime(int millis) {
        int seconds = millis / 1000;
        int minutes = seconds / 60;
        int hours = minutes / 60;
        return (hours == 0 ? "- - : " : formatS(hours) + ":") + formatS(minutes % 60) + ":" + formatS(seconds % 60);
    }

    private String formatS(int x) {
        String s = "" + x;
        if (s.length() == 1)
            s = "0" + s;
        return s;
    }


    Runnable runnable = new Runnable() {
        @Override
        public void run() {
            displayCurrentTime();

            mHandler.postDelayed(this, 100);
        }
    };

    @Override
    public void onClick(View view) {
        switch (view.getId()) {
            case R.id.play_video:
                if (null != mYoutubePlayer && !mYoutubePlayer.isPlaying())
                    mYoutubePlayer.play();
                break;
            case R.id.pause_video:
                if (null != mYoutubePlayer && mYoutubePlayer.isPlaying())
                    mYoutubePlayer.pause();
                break;
        }
    }

    @Override
    protected void onPause() {
        super.onPause();
        mYoutubePlayer.release();
        mYoutubePlayer = null;
        mHandler.removeCallbacks(runnable);
    }
}


edit(2017/03/27)
上面無法和seekbar連動,當你移動seekbar影片會跟著移動,但影片再撥放的時候seekbar無法連動。
我試過RunOnUiThread設定seekbar會發生錯誤。
我修好的話會在上傳新code


協程(coroutine) - 協程為什麼要學它?

 Coroutine 協程 再強調一次 協程就是由kotlin官方所提供的線程api //Thread Thread { }.start() //Executor val execu...