show code block

2017年3月22日 星期三

third-party元件(Youtube API) ─ Youtube API 簡易使用(二) 控制元件、移除SeekBar、自訂按鈕

前言:


今天來講一下YoutubePlay的控制方式。

想要自己控制PLAY、PAUSE按鈕,又或者想要自訂SeekBar。

這時候就必須要一個乾淨純粹的View ─

除了一個Time Bar 和點擊畫面上的Play、Pause外,是不是很乾淨的,很純粹。


其實也可以把所有控制按鈕都拿掉,所有的控制元件都自己設定,就像MixerBox一樣。

MixerBox就是自己控制所有元件的最好例子,單看畫面還不覺得這出自Youtube!

先讓我們看看Youtube官方文件。
https://developers.google.com/youtube/android/player/reference/com/google/android/youtube/player/YouTubePlayer.PlayerStyle

在裡面有一個mothed是專門控制Style的


YouTubePlayer.PlayerStyle

java.lang.Object
   ↳java.lang.Enum<E extends java.lang.Enum<E>>
   ↳com.google.android.youtube.player.YouTubePlayer.PlayerStyle

Overview

The different styles available for the player.

Summary

Enum values
YouTubePlayer.PlayerStyle.CHROMELESSA style that shows no interactive player controls.
YouTubePlayer.PlayerStyle.DEFAULTThe default style, showing all interactive controls.
YouTubePlayer.PlayerStyle.MINIMALA minimal style, showing only a time bar and play/pause controls.
Public methods
static YouTubePlayer.PlayerStylevalueOf(String name)
final static PlayerStyle[]values()


public static final YouTubePlayer.PlayerStyle CHROMELESS

A style that shows no interactive player controls.
這個風格完全移除和畫面的互動,所有東西都必須自訂。
ex:就如同MixerBox一樣,自訂所有畫面

public static final YouTubePlayer.PlayerStyle DEFAULT

The default style, showing all interactive controls.
正常版風格,保留了一切你在Youtube上面看的到的控制元件,包含點它們右下角的Youtube可直接跳轉到它們app觀看的原件。

public static final YouTubePlayer.PlayerStyle MINIMAL

A minimal style, showing only a time bar and play/pause controls.
最小簡化的風格,只保留TimeBar和螢幕上的播放和暫停控制元件。
ex:就如同我前言那張圖一樣,可以明顯看出pause暫停按鈕和下面的TimeBar


程式碼:

先前的程式碼請先參考:http://nikeru8.blogspot.tw/2017/03/androidyoutube-api-youtube-api.html

我們加在讀取成功後的方法內。

onInitializationSuccess


當然要讀取成功後控制這一切才有意義XDD
 @Override
    public void onInitializationSuccess(YouTubePlayer.Provider provider, YouTubePlayer youTubePlayer, boolean wasRestored) {
        Toast.makeText(this, "onInitializationSuccess!", Toast.LENGTH_SHORT).show();
        if (youTubePlayer == null) {
            Log.d("CheckPoint", "CheckPoint youtubePlayer == null");
            return;
        }
        // Start buffering
        if (!wasRestored) {
            Log.d("CheckPoint", "CheckPoint !wasRestored");
            youTubePlayer.cueVideo(VIDEO_ID);
        }
//        youTubePlayer.setPlayerStyle(YouTubePlayer.PlayerStyle.CHROMELESS);//移除全部控制按鈕
//        youTubePlayer.setPlayerStyle(YouTubePlayer.PlayerStyle.DEFAULT);//原版
        youTubePlayer.setPlayerStyle(YouTubePlayer.PlayerStyle.MINIMAL);//移除下面的控制按鈕
    }


這邊比較值得注意的是,使用PlayerStyle.CHROMELESS時,因為移除了全部的控制按鈕,你甚至不能按下Play按鈕,要請你自己添加控制元件囉。
不然就會像一張圖片一樣卡在那。


控制元件Code:

如上所述,先在onInitializationSuccess內上程式碼。

youTubePlayer.setPlayerStyle(YouTubePlayer.PlayerStyle.CHROMELESS);


再來改變main_activity.xml的布局

main_activity.xml

<?xml version="1.0" encoding="utf-8"?>
<RelativeLayout

    xmlns:android="http://schemas.android.com/apk/res/android"
    xmlns:tools="http://schemas.android.com/tools"
    android:layout_width="match_parent"
    android:layout_height="match_parent"
    tools:context="com.chat.a015865.youtube.MainActivity">

    <com.google.android.youtube.player.YouTubePlayerView
        android:id="@+id/player_view"
        android:layout_width="match_parent"
        android:layout_height="wrap_content" />

    <LinearLayout
        android:id="@+id/video_control"
        android:layout_width="match_parent"
        android:layout_height="wrap_content"
        android:layout_below="@+id/player_view"
        android:background="#444"
        android:gravity="center_vertical"
        android:orientation="horizontal"
        android:visibility="visible"
        android:weightSum="10"
        tools:layout_editor_absoluteX="84dp"
        tools:layout_editor_absoluteY="374dp">

        <ImageButton
            android:id="@+id/play_video"
            android:layout_width="0dp"
            android:layout_height="wrap_content"
            android:layout_margin="5dp"
            android:layout_weight="1"
            android:background="@null"
            android:src="@drawable/ic_play" />

        <ImageButton
            android:id="@+id/pause_video"
            android:layout_width="0dp"
            android:layout_height="wrap_content"
            android:layout_margin="5dp"
            android:layout_weight="1"
            android:background="@null"
            android:src="@drawable/ic_pause" />

        <SeekBar
            android:id="@+id/video_seekbar"
            android:layout_width="0dp"
            android:layout_height="wrap_content"
            android:layout_margin="10dp"
            android:layout_weight="6"
            android:max="100"
            android:progress="0" />

        <TextView
            android:id="@+id/play_time"
            android:layout_width="0dp"
            android:layout_height="wrap_content"
            android:layout_margin="5dp"
            android:layout_weight="2"
            android:text="--:--"
            android:textColor="@android:color/white" />
    </LinearLayout>
</RelativeLayout>


MainActivity.java

public class MainActivity extends YouTubeBaseActivity implements YouTubePlayer.OnInitializedListener, View.OnClickListener {


    public static final String API_KEY = "AIzaSyAPThx6WbAxjnX2En0qtf9OhD80tUcp380";

    //https://www.youtube.com/watch?v=
    public static final String VIDEO_ID = "qZIWO9TqvIA";

    private YouTubePlayer mYoutubePlayer;
    private View mPlayButtonLayout;
    private TextView mPlayTimeTextView;

    private Handler mHandler = null;
    private SeekBar mSeekBar;


    @Override
    protected void onCreate(@Nullable Bundle savedInstanceState) {
        super.onCreate(savedInstanceState);
        setContentView(R.layout.activity_main);

        final YouTubePlayerView mYoutubePlayerView = (YouTubePlayerView) findViewById(R.id.player_view);
        mYoutubePlayerView.initialize(API_KEY, this);
        initView();
        mPlayButtonLayout = findViewById(R.id.video_control);
        findViewById(R.id.play_video).setOnClickListener(this);
        findViewById(R.id.pause_video).setOnClickListener(this);

        mPlayTimeTextView = (TextView) findViewById(R.id.play_time);
        mSeekBar = (SeekBar) findViewById(R.id.video_seekbar);
        mSeekBar.setOnSeekBarChangeListener(mVideoSeekBarChangeListener);
        mHandler = new Handler();
    }

    private void initView() {

    }

    @Override
    public void onInitializationSuccess(YouTubePlayer.Provider provider, YouTubePlayer youTubePlayer, boolean wasRestored) {
        Toast.makeText(this, "onInitializationSuccess!", Toast.LENGTH_SHORT).show();
        mYoutubePlayer = youTubePlayer;
        if (youTubePlayer == null) {
            Log.d("CheckPoint", "CheckPoint youtubePlayer == null");
            return;
        }
        // Start buffering
        if (!wasRestored) {
            Log.d("CheckPoint", "CheckPoint !wasRestored");
            youTubePlayer.cueVideo(VIDEO_ID);
        }
        youTubePlayer.setPlayerStyle(YouTubePlayer.PlayerStyle.CHROMELESS);
//        youTubePlayer.setPlayerStyle(YouTubePlayer.PlayerStyle.DEFAULT);//原版
//        youTubePlayer.setPlayerStyle(YouTubePlayer.PlayerStyle.MINIMAL);//移除下面的控制按鈕

        youTubePlayer.setPlayerStateChangeListener(mPlayerStateChangeListener);//影片在run時的狀態
        youTubePlayer.setPlaybackEventListener(mPlaybacckEventListener);
    }

    YouTubePlayer.PlaybackEventListener mPlaybacckEventListener = new YouTubePlayer.PlaybackEventListener() {
        @Override
        public void onPlaying() {
            mHandler.postDelayed(runnable, 100);
            displayCurrentTime();
        }

        @Override
        public void onPaused() {
            mHandler.removeCallbacks(runnable);
        }

        @Override
        public void onStopped() {
            mHandler.removeCallbacks(runnable);
        }

        @Override
        public void onBuffering(boolean b) {

        }

        @Override
        public void onSeekTo(int i) {
            Log.d("CheckPoint", "CheckPoint i = " + i);
            mHandler.postDelayed(runnable, 100);
        }
    };
    YouTubePlayer.PlayerStateChangeListener mPlayerStateChangeListener = new YouTubePlayer.PlayerStateChangeListener() {
        @Override
        public void onLoading() {

        }

        @Override
        public void onLoaded(String s) {

        }

        @Override
        public void onAdStarted() {

        }

        @Override
        public void onVideoStarted() {
            displayCurrentTime();
        }

        @Override
        public void onVideoEnded() {

        }

        @Override
        public void onError(YouTubePlayer.ErrorReason errorReason) {

        }
    };

    @Override
    public void onInitializationFailure(YouTubePlayer.Provider provider, YouTubeInitializationResult youTubeInitializationResult) {
        Toast.makeText(this, "Failed to initialize.", Toast.LENGTH_LONG).show();
    }

    SeekBar.OnSeekBarChangeListener mVideoSeekBarChangeListener = new SeekBar.OnSeekBarChangeListener() {
        @Override
        public void onProgressChanged(final SeekBar seekBar, final int progress, boolean fromUser) {
            long lengthPlayed = (mYoutubePlayer.getDurationMillis() * progress) / 100;
            mYoutubePlayer.seekToMillis((int) lengthPlayed);
            seekBar.setProgress(progress);
        }

        @Override
        public void onStartTrackingTouch(SeekBar seekBar) {

        }

        @Override
        public void onStopTrackingTouch(SeekBar seekBar) {

        }
    };

    private void displayCurrentTime() {
        if (mYoutubePlayer == null) return;
        String formattedTime = formatTime(mYoutubePlayer.getDurationMillis() - mYoutubePlayer.getCurrentTimeMillis());
        mPlayTimeTextView.setText(formattedTime);
    }

    private String formatTime(int millis) {
        int seconds = millis / 1000;
        int minutes = seconds / 60;
        int hours = minutes / 60;
        return (hours == 0 ? "- - : " : formatS(hours) + ":") + formatS(minutes % 60) + ":" + formatS(seconds % 60);
    }

    private String formatS(int x) {
        String s = "" + x;
        if (s.length() == 1)
            s = "0" + s;
        return s;
    }


    Runnable runnable = new Runnable() {
        @Override
        public void run() {
            displayCurrentTime();

            mHandler.postDelayed(this, 100);
        }
    };

    @Override
    public void onClick(View view) {
        switch (view.getId()) {
            case R.id.play_video:
                if (null != mYoutubePlayer && !mYoutubePlayer.isPlaying())
                    mYoutubePlayer.play();
                break;
            case R.id.pause_video:
                if (null != mYoutubePlayer && mYoutubePlayer.isPlaying())
                    mYoutubePlayer.pause();
                break;
        }
    }

    @Override
    protected void onPause() {
        super.onPause();
        mYoutubePlayer.release();
        mYoutubePlayer = null;
        mHandler.removeCallbacks(runnable);
    }
}


edit(2017/03/27)
上面無法和seekbar連動,當你移動seekbar影片會跟著移動,但影片再撥放的時候seekbar無法連動。
我試過RunOnUiThread設定seekbar會發生錯誤。
我修好的話會在上傳新code


third-party元件(Youtube API)─ Youtube API 簡易使用、匯入專案lib

前言:


此篇我們來實作內崁Youtube影音的功能。

為什麼不用WebView直接內崁?

因為WebView內崁的方式很醜阿。
會變下圖這樣


我不想要下面這些東西,想要單純的只有影片,其他東西我可以自由地運用。

當然還有一些比較特別的使用方式。

像是MixerBox,就是拿這個在營利。


1、首先先去這網頁下載他們的api
https://developers.google.com/youtube/android/player/downloads/


下載下來會是一個.zip檔案那要怎麼import到android studio內呢?


2、先解壓縮吧。
然後打開資料夾找到libs檔案我們需要的東西在裡面。

你會找到YouTubeAndroidPlayerApi.jar這的檔案。

然後找到你的專案在最最上層開一個libs資料夾,以後好方便管理你import的東西。
3、回到Android Studio內,右上方File >> Project Structure...


按下去之後,找到你自己專案,案ok


我們就可以使用Youtube API囉


程式碼:

先給網路權限吧!

AndroidManifest

<uses-permission android:name="android.permission.INTERNET" />


1、增加YouTubePlayerView到xml內

在main_activity.java內設定View

main_activity.java

<?xml version="1.0" encoding="utf-8"?>
<android.support.constraint.ConstraintLayout
    xmlns:android="http://schemas.android.com/apk/res/android"
    xmlns:app="http://schemas.android.com/apk/res-auto"
    xmlns:tools="http://schemas.android.com/tools"
    android:layout_width="match_parent"
    android:layout_height="match_parent"
    tools:context="com.chat.a015865.youtube.MainActivity">

    <com.google.android.youtube.player.YouTubePlayerView
        android:id="@+id/player_view"
        android:layout_width="match_parent"
        android:layout_height="wrap_content" />

</android.support.constraint.ConstraintLayout>


2、初始化YouTubePlayerView(Initialize)

MainActivity.java內,在要使用YouTubePlayerViewactivity都一定要改extends繼承變成YouTubeBaseActivity,並且imp;ements YouTubePlayer.OnInitializedListener

implements YouTubePlayer.OnInitializedListener 之後,請implements methods

拿到onInitializationSuccess(初始化成功)和onInitializationFailure(初始化失敗)

在onCreate內初始化YouTubePlayerView

mYoutubePlayerView.initialize(API_KEY, this);

API_KEY目前用不到,可以先隨便給值。

Youtube網址的格式 https://www.youtube.com/watch?v= xxxxxx 後面的的xxxxxx可以改變你想看的頻道。試著去YOUTUBE上找你喜愛的頻道,COPY後面的xxxxxx回到MainActivity.java改變VEDIO_ID,就可以改變你要看的東西。


MainActivity.java

public class MainActivity extends YouTubeBaseActivity implements YouTubePlayer.OnInitializedListener {


    public static final String API_KEY = "htyhry";

    //https://www.youtube.com/watch?v=
    public static final String VIDEO_ID = "OsUr8N7t4zc";
    private YouTubePlayerView mYoutubePlayerView;

    @Override
    protected void onCreate(@Nullable Bundle savedInstanceState) {
        super.onCreate(savedInstanceState);
        setContentView(R.layout.activity_main);

        mYoutubePlayerView = (YouTubePlayerView) findViewById(R.id.player_view);
        mYoutubePlayerView.initialize(API_KEY, this);
    }

    @Override
    public void onInitializationSuccess(YouTubePlayer.Provider provider, YouTubePlayer youTubePlayer, boolean wasRestored) {
        Toast.makeText(this, "onInitializationSuccess!", Toast.LENGTH_SHORT).show();
        if (youTubePlayer == null) {
            Log.d("CheckPoint", "CheckPoint youtubePlayer == null");
            return;
        }
        
        if (!wasRestored) {
            Log.d("CheckPoint", "CheckPoint !wasRestored");
            youTubePlayer.cueVideo(VIDEO_ID);
        }
    }

    @Override
    public void onInitializationFailure(YouTubePlayer.Provider provider, YouTubeInitializationResult youTubeInitializationResult) {
        Toast.makeText(this, "Failed to initialize.", Toast.LENGTH_LONG).show();

    }
}


這時候你就可以開始跑你的專案了,五月天的頑固就出現拉!


3、控制 YouTubePlayer 事件

其中還有一些控制YouTubePlayer的方法,像是可以再按暫停的同時,加入你要的廣告....之類的。
MainAcitivity.java內 >> onInitializationSuccess這裡面加入這個方法,可以控制Loading、onLoaded、onAdStarted....等等。

 youTubePlayer.setPlayerStateChangeListener(new YouTubePlayer.PlayerStateChangeListener() {
            @Override
            public void onLoading() {
                Log.d("CheckPoint", "CheckPoint onLoading");
            }

            @Override
            public void onLoaded(String s) {
                Log.d("CheckPoint", "CheckPoint onLoaded");
            }

            @Override
            public void onAdStarted() {
                Log.d("CheckPoint", "CheckPoint onAdStarted");
            }

            @Override
            public void onVideoStarted() {
                Log.d("CheckPoint", "CheckPoint onVideoStarted");
            }

            @Override
            public void onVideoEnded() {
                Log.d("CheckPoint", "CheckPoint onVideoEnded");
            }

            @Override
            public void onError(YouTubePlayer.ErrorReason errorReason) {
                Log.d("CheckPoint", "CheckPoint onError = " + errorReason);
            }
        });


文獻:


Demo:


Android2.3 一 些更新上的問題 import、ConstraintLayout 、Gradle Sync failed could not find constraint-layout:1.0.0-alpha8

前言:

前幾天我更新上最新版的android studio。

在創建新專案的時候,發生了一個不知名的錯誤。


專案build不起來,而且

dependencies {
    compile 'com.android.support.constraint:constraint-layout:1.0.0-alpha8'
}
這行報錯誤了!

研究了一下才發現原來android的MainActivity換新東西了。

現在你創建一個空白的Activity它內建都會給你ConstraintLayout

至於這是什麼東西呢?

詳解請看:
Layout新成員ConstraintLayout,終於向iOS的AutoLayout看齊

至於解決方法,讓我們繼續看下去。


解決方法:

1、在android studio上,案右上角的File >> setting 開啟下圖

看圖說故事,第四步驟記得勾起來。

把其他打勾的地方取消掉!只留1.0.2這個版本。

2、然後讓我們再回到build.gradle(Module:app) 

我們來更動一下

dependencies {
    compile 'com.android.support.constraint:constraint-layout:1.0.2'
}

這樣問題就迎刃而解囉。


2017年3月21日 星期二

Android元件(PopupWindow、PopupView) ─ 彈跳視窗、PopupWindow 7.0 7.1故障排除、PopupWindow取代方法

前言:


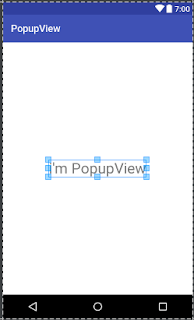
這就是PopupView的效果。

你可以在View上面設計自己想要做的任何事情。
跟Dialog一模一樣。
也許你會問那直接用Dialog就好了啊,幹嘛用PopupView?
是沒錯,但PopupView使用上比較直觀,個人比較愛這個(誤 根本是自己用習慣了)


程式碼實作:


先在xml裡面畫一個item,我把它命名為 popupview_item.xml (res/layout/popupview_item.xml)

隨意在popupview_item上面畫上你要的東西。

popupview_item.xml


<?xml version="1.0" encoding="utf-8"?>
<RelativeLayout xmlns:android="http://schemas.android.com/apk/res/android"
    android:layout_width="match_parent"
    android:layout_height="match_parent"
    android:background="@android:color/white"
    android:orientation="vertical">

    <TextView
        android:layout_width="wrap_content"
        android:layout_height="wrap_content"
        android:layout_centerInParent="true"
        android:text="i'm PopupView"
        android:textSize="30dp" />
</RelativeLayout>


之後再main_activity內加一個Button,讓我們能呼叫PopupView
main_activity.xml

<?xml version="1.0" encoding="utf-8"?>
<RelativeLayout
    xmlns:android="http://schemas.android.com/apk/res/android"
    xmlns:tools="http://schemas.android.com/tools"
    android:id="@+id/main_activity"
    android:layout_width="match_parent"
    android:layout_height="match_parent"
    tools:context="com.chat.a015865.popupview.MainActivity">

    <Button
        android:id="@+id/button_popup"
        android:layout_width="wrap_content"
        android:layout_height="wrap_content"
        android:text="popup" />
</RelativeLayout>


讓我們回到MainActivity.java

       import android.app.Activity;
import android.content.Context;
import android.graphics.Bitmap;
import android.graphics.drawable.BitmapDrawable;
import android.os.Bundle;
import android.os.IBinder;
import android.support.v7.app.AppCompatActivity;
import android.view.Gravity;
import android.view.View;
import android.view.ViewGroup;
import android.view.WindowManager;
import android.view.inputmethod.InputMethodManager;
import android.widget.Button;
import android.widget.PopupWindow;
import android.widget.RelativeLayout;

public class MainActivity extends AppCompatActivity {
    private Activity mActivity;
    private PopupWindow mQuestionPopupWindow;
    private View rootView;
    private Button mButton;

    @Override
    protected void onCreate(Bundle savedInstanceState) {
        super.onCreate(savedInstanceState);
        setContentView(R.layout.activity_main);
        mActivity = this;
        initView();
        initSet();
        initListener();


    }

    private void initView() {
        mButton = (Button) findViewById(R.id.button_popup);
    }

    private void initSet() {

    }

    private void initListener() {
        mButton.setOnClickListener(new View.OnClickListener() {
            @Override
            public void onClick(View view) {
                PopupView();
            }
        });
    }


    private void PopupView() {
        //隱藏鍵盤(mActivity是你當前的activity)
        IBinder mIBinder = null;
        if (mActivity.getCurrentFocus() != null) {
            mIBinder = mActivity.getCurrentFocus().getWindowToken();
        }

        InputMethodManager mInputMethodManager = (InputMethodManager) getSystemService(Context.INPUT_METHOD_SERVICE);
        mInputMethodManager.hideSoftInputFromWindow(mIBinder, InputMethodManager.HIDE_NOT_ALWAYS);

        //創造PopupView(popupview_item是你要顯示在View上的xml)
        final ViewGroup nullParent = null;
        View popupView = getLayoutInflater().inflate(R.layout.popupview_item, nullParent);

        //設定PopupView
        mQuestionPopupWindow = new PopupWindow(popupView, RelativeLayout.LayoutParams.MATCH_PARENT, RelativeLayout.LayoutParams.WRAP_CONTENT, true);
        mQuestionPopupWindow.setTouchable(true);
        mQuestionPopupWindow.setOutsideTouchable(true);
        mQuestionPopupWindow.setBackgroundDrawable(new BitmapDrawable(getResources(), (Bitmap) null));
        mQuestionPopupWindow.setSoftInputMode(WindowManager.LayoutParams.SOFT_INPUT_ADJUST_RESIZE);

        //設定rootView 讓PopupView在rootView之上開啟
        rootView = getLayoutInflater().inflate(R.layout.activity_main, nullParent);
        mQuestionPopupWindow.showAtLocation(rootView, Gravity.BOTTOM, 0, 0);


        //設定透明度(popupview視窗外設為灰色)
        WindowManager.LayoutParams lp = mActivity.getWindow()
                .getAttributes();
        lp.alpha = 0.4f;
        mActivity.getWindow().addFlags(WindowManager.LayoutParams.FLAG_DIM_BEHIND);
        mActivity.getWindow().setAttributes(lp);

        mQuestionPopupWindow.setOnDismissListener(new PopupWindow.OnDismissListener() {

            // 在dismiss中恢复透明度
            public void onDismiss() {
                WindowManager.LayoutParams lp = mActivity.getWindow()
                        .getAttributes();
                lp.alpha = 1f;
                mActivity.getWindow().addFlags(WindowManager.LayoutParams.FLAG_DIM_BEHIND);
                mActivity.getWindow().setAttributes(lp);
            }
        });

    }
}

設定灰色的部分非必要,在這邊是為了模擬Dialog效果
/*
*.showAtLocation(rootView, Gravity.BOTTOM, 0, 0); 此行是執行這PopupView的方法
*rootView 是popupView要顯示的基底View
*Gravity.BOTTOM 是你要讓popupView顯示的位址
**/


到這邊你就能完整的複製出PopupView的效果了。
Demo:https://drive.google.com/open?id=0Byk75IYx-dKXZkV5R1FBOGQ0Wm8


Demo完成品─


故障排除:

但最近在Android 7.0 和Android 7.1 大量出現PopupWindow跑位、無法使用的災情。

我也是受害者之一。

關鍵字打PopupWindow 7.0 or 7.1 就一大堆。這邊就不再贅述。

但我使用以上方法,7.0修好了 7.1上卻不能!
7.1弄好了,又換7.0有問題。

一氣之下我直接用Dialog取代了PopupWindow。

但不管怎麼改都會有個問題,Dialog沒辦法滿版,我研究了一陣子就往Theme和xml去調整。

先往res/values/colors  和 res/values/styles裡面添加顏色theme

<color name="transparent_background">#50000000</color>
這行是半透明的色碼

 res/values/colors


res/values/styles


<style name="full_screan_dialog">
    <item name="android:windowBackground">@color/transparent_background</item>
    <item name="android:windowIsTranslucent">true</item>
    <item name="android:windowContentOverlay">@null</item>
    <item name="android:windowNoTitle">false</item>
    <item name="android:windowIsFloating">false</item>
    <item name="android:backgroundDimEnabled">false</item>
</style>


讓我們回到MainActivity.java

修改popupView這個方法內的東西,把有關PopupWindow的東西都砍掉,讓我們換成Dialog

  private void PopupView() {
        //隱藏鍵盤(mActivity是你當前的activity)
        IBinder mIBinder = null;
        if (mActivity.getCurrentFocus() != null) {
            mIBinder = mActivity.getCurrentFocus().getWindowToken();
        }
        InputMethodManager mInputMethodManager = (InputMethodManager) getSystemService(Context.INPUT_METHOD_SERVICE);
        mInputMethodManager.hideSoftInputFromWindow(mIBinder, InputMethodManager.HIDE_NOT_ALWAYS);
        //創造PopupView(popupview_item是你要顯示在View上的xml)
        final ViewGroup nullParent = null;
        View popupView = getLayoutInflater().inflate(R.layout.popupview_item, nullParent);
        AlertDialog.Builder builder = new AlertDialog.Builder(mActivity, R.style.full_screan_dialog);
        builder.setView(popupView);
        final AlertDialog dialog = builder.create();
        Window dialogWindow = dialog.getWindow();
        WindowManager.LayoutParams lp = dialogWindow.getAttributes();
        dialogWindow.setGravity(Gravity.BOTTOM);
        dialogWindow.setAttributes(lp);
        dialog.show();
    }


大功告成囉!

但你會發現Dialog飄在上面,這就是和PopupView不同處了。

此時我們要修改一下原本的popupview_item.xml
讓他能符合我們的期待。

popupview_item.xml
<?xml version="1.0" encoding="utf-8"?>
<RelativeLayout xmlns:android="http://schemas.android.com/apk/res/android"
    android:layout_width="match_parent"
    android:layout_height="match_parent"
    android:background="@android:color/white"
    android:orientation="vertical">

    <RelativeLayout
        android:layout_width="match_parent"
        android:layout_height="wrap_content">

        <LinearLayout
            android:layout_width="match_parent"
            android:layout_height="wrap_content"
            android:layout_alignParentBottom="true"
            android:layout_centerHorizontal="true"
            android:background="@android:color/white"
            android:gravity="center">

            <TextView
                android:layout_width="wrap_content"
                android:layout_height="wrap_content"
                android:layout_centerInParent="true"
                android:text="i'm PopupView"
                android:textSize="30dp" />
        </LinearLayout>
    </RelativeLayout>

</RelativeLayout>


讓程式跑跑看吧!和PopupWindow一樣的效果出來囉。

如果有問題再讓我知道,我會做修正。
下班囉!


Demo:
https://drive.google.com/open?id=0Byk75IYx-dKXdllUSlZUaC1oTEk


2017年3月17日 星期五

執行緒 ─ Thread、Handler

執行緒大全:

執行緒一

http://givemepass.blogspot.tw/2015/10/hello_90.html

thread的使用方式

public class MyTask implements Runnable{
    public void run(){
        //execute your task
    }
}
new Thread(new MyTask()).start();


執行緒二

http://givemepass-blog.logdown.com/posts/296942-how-to-use-the-thread-2

//新建(尚未啟動的狀態)
new Thread(myRunnable);

//Runnable(進入可排程系統, 只要排程器(Scheduler)指派它給CPU執行, 則會開始執行run方法。)
new Thread(myRunnable).start();

flag 為一個Boolean值,讓flag == false 就可以停止Thread

new Thread(new Runnable(){
    public void run(){
        while(flag){
            //task

        }
    }
}).start();

Thread thread = new Thread(new Runnable(){
    public void run(){
       try{
           //task

       } catch(InterruptExcetption e){
           //handle exception

       }
    }
});
thread.start();
thread.interrupt();

當啟動Thread以後, 想要停止就呼叫Interrupt則會發出Exception來停止Thread。

如何使用Handler

http://givemepass-blog.logdown.com/posts/296606-how-to-use-a-handler

//runOnUiThread幫你另開執行緒,結束ui後回到主要執行緒。
new Thread(new Runnable() {
    public void run() {
        //這邊是背景thread在運作, 這邊可以處理比較長時間或大量的運算

        ((Activity) mContext).runOnUiThread(new Runnable() {
            public void run() {
                //這邊是呼叫main thread handler幫我們處理UI部分              

            }
        });
    }
}).start();


到這裡,你一定會疑惑handler的實質上到底幹嘛的,這時候就可以看這一篇。

Android 執行緒 - Thread 與 Handler

http://andcooker.blogspot.tw/2012/09/android-thread-handler.html


其它很棒的延伸


如何使用HandlerThread
http://givemepass-blog.logdown.com/posts/296790-how-to-use-handlerthread

如何使用AsyncTask
http://givemepass-blog.logdown.com/posts/297108-how-to-use-asynctask

如何使用ThreadPool
http://givemepass-blog.logdown.com/posts/296960-how-to-use-the-threadpool

如何使用ThreadPool 來下載網路圖片
http://givemepass-blog.logdown.com/posts/289636-how-to-use-the-threadpool-to-download-pictures

當你上面全部看完之後,最後來幫你搞懂

如何了解Task、Thread、ThreadPool、Handler、Looper、Message、MessageQueue、AsyncTask
http://givemepass-blog.logdown.com/posts/297175-how-to-understand


簡易使用
new Handler().postDelayed(new Runnable(){
   public void run(){
       //處理少量資訊或UI
   }
}, 3000);

new Thread(new Runnable() {
    public void run() {
        //這邊是背景thread在運作, 這邊可以處理比較長時間或大量的運算
        ((Activity) mContext).runOnUiThread(new Runnable() {
            public void run() {
                //這邊是呼叫main thread handler幫我們處理UI部分          
            }
        });
    }
}).start();
//或者

view.post(new Runnable(){
    public void run(){
        //更新畫面
    }
});

//又或者另外一種寫法
private Handler mHandler = new Handler(){
    @Override
    public void handleMessage(Message msg) {
        switch(msg.what){
            case 1:
                //處理少量資訊或UI
            break;
        }
    }
};

new Thread(new Runnable(){
    public void run(){
        Message msg = new Message();
        msg.what = 1;
        mHandler.sendMessage(msg);
    }
});

2017年3月15日 星期三

android元件(Animation) ─ 自訂動畫效果

前言:

讓自己的圖片動起來!

此次實作影片 ─


程式碼實作:

這次的簡易流程圖:


先把圖片下載下來吧。
1、此次實作的五張圖片下載:
https://drive.google.com/open?id=0Byk75IYx-dKXSWRyR0FYUXJ5S0U


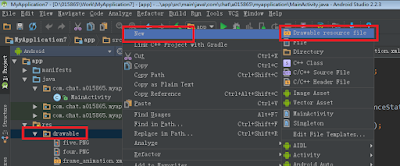
2、在res/drawable 下創建一個 xml 我們命名為frame_animation

改寫frame_animation.xml內的code

<?xml version="1.0" encoding="utf-8"?>
<animation-list xmlns:android="http://schemas.android.com/apk/res/android" android:oneshot="false">
<item android:drawable="@drawable/one" android:duration="100"/>
    <item android:drawable="@drawable/two" android:duration="100"/>
    <item android:drawable="@drawable/three" android:duration="100"/>
    <item android:drawable="@drawable/four" android:duration="100"/>
    <item android:drawable="@drawable/five" android:duration="100"/>
</animation-list>

/*
*oneshot="false" 設成false讓他能重複顯示
*duration 是顯示的秒數
**/


activity_main.xml 


tent"
        android:layout_toRightOf="@+id/show_animation"
        android:text="text" />

    <LinearLayout
        android:layout_width="wrap_content"
        android:layout_height="wrap_content"
        android:layout_below="@+id/show_animation"
        android:orientation="horizontal">

        <Button
            android:id="@+id/start_button"
            android:layout_width="wrap_content"
            android:layout_height="wrap_content"
            android:onClick="click"
            android:text="start" />

        <Button
            android:id="@+id/stop_button"
            android:layout_width="wrap_content"
            android:layout_height="wrap_content"
            android:onClick="click"
            android:text="stop" />

        <Button
            android:id="@+id/fivesec_button"
            android:layout_width="wrap_content"
            android:layout_height="wrap_content"
            android:onClick="click"
            android:text="fiveSecButton" />
    </LinearLayout>
</RelativeLayout>


MainActivity.java

public class MainActivity extends AppCompatActivity {

    private ImageView mImageView;
    private AnimationDrawable mFrameAnimation;
    private TextView mMessage;

    @Override
    protected void onCreate(Bundle savedInstanceState) {
        super.onCreate(savedInstanceState);
        setContentView(R.layout.activity_main);
        initView();
    }

    private void initView() {
        mImageView = (ImageView) findViewById(R.id.show_animation);
        mMessage = (TextView) findViewById(R.id.show_text);

        mImageView.setBackgroundResource(R.drawable.frame_animation);
        mFrameAnimation = (AnimationDrawable) mImageView.getBackground();
    }

    public void click(View view) {
        switch (view.getId()) {
            case R.id.start_button:
                mFrameAnimation.start();
                break;
            case R.id.stop_button:
                mFrameAnimation.stop();
                break;
            case R.id.fivesec_button:
                Toast.makeText(this,"not finish!",Toast.LENGTH_SHORT).show();
                break;

        }
    }
}


/*
*click  呼應了我在cml寫的onClick 這也是另外一種Listener 點擊的使用方式
**/
完成囉!
下一篇在來時做延遲五秒的按鈕。


demo:

https://drive.google.com/open?id=0Byk75IYx-dKXeE9OZzFGaHFZQWM

2017年3月13日 星期一

Android元件 ─ PointOfOrigin 點擊後彈出視窗

前言:


接續前一篇RecyclerView的範例。

可直接下載範本來做修改。

這次做的是類似PopupView的彈跳效果,但自帶動畫,更為方便!


重點程式碼:

本次更動簡易流程 ─


drawable內的loading圖片下載:
https://cdn-images-1.medium.com/max/800/0*-IoUUPvNx3NihgGi.gif

我們直接從RecyclerViewAdapter.java內的
onBindViewHolder裡面的點擊事件開啟我們的第一步:
  @Override
    public void onBindViewHolder(final RecyclerViewAdapter.MyHolder holder, final int position) {
        Glide.with(mContext).load(itemsData[position].getImageUrl())
                .error(R.drawable.loading)
                .placeholder(R.drawable.tool)
                .into(holder.mImageView);
      holder.mTextView.setText(itemsData[position].getTitle());

      holder.setOnItemClick(new View.OnClickListener() {
            @Override
            public void onClick(View v) {
              //設定你點擊每個Item後,要做的事情
            }
        });
    }


接下來實作PointOfOrigin 點擊後彈出視窗
先額外創建一個Activity,我命名為secondActivity.java 和 activity_second.xml
activity_second.xml
<?xml version="1.0" encoding="utf-8"?>
<LinearLayout xmlns:android="http://schemas.android.com/apk/res/android"
    android:layout_width="match_parent"
    android:layout_height="match_parent"
    android:layout_gravity="bottom"
    android:gravity="bottom"
    android:orientation="vertical">

    <TextView
        android:layout_width="match_parent"
        android:layout_height="wrap_content"
        android:layout_marginBottom="150dp"
        android:layout_marginLeft="20dp"
        android:layout_marginRight="20dp"
        android:layout_marginTop="20dp"
        android:gravity="center"
        android:text="Point Of Origin Demo \n\n返回鍵返回" />

    <ImageView
        android:id="@+id/image"
        android:layout_width="match_parent"
        android:layout_height="wrap_content"
        android:adjustViewBounds="true"
        android:cropToPadding="false"
        android:scaleType="fitCenter"
        android:src="@drawable/loading"
        android:transitionName="tImage" />
</LinearLayout>

secondActivity.java
public class SecondActivity extends Activity {
    private static final String TAG = "SecondActivity";

    private ImageView image;

    @Override
    protected void onCreate(Bundle savedInstanceState) {
        super.onCreate(savedInstanceState);
        setContentView(R.layout.activity_second);

        image = (ImageView) findViewById(R.id.image);
        if (getIntent() != null) {
            Log.i(TAG, "CheckPoint getIntent() != null" + getIntent());
//            int res = getIntent().getIntExtra("imageRes", 0);
            String res = getIntent().getStringExtra("imageRes");

            if (res != null)
                Glide.with(this).load(res).placeholder(R.drawable.loading).into(image);
        } else {
            Log.i(TAG, "CheckPoint onCreate:  getIntent()==null");
        }
    }
}


創建好後,在RecyclerViewAdapter.java內的onBindViewHolder裡面
 holder.setOnItemClick(new View.OnClickListener() {
            @Override
            public void onClick(View v) {
                // 宣告一組配對,底下我們讓MainActivity裡[RecyclerView]->[ItemList]->[ImageView]和SecondActivity裡的ImageView作成一組配對
               Pair imagePair = Pair.create((View) holder.mImageView, "tImage");
                Intent transitionIntent = new Intent(mContext, SecondActivity.class);
                transitionIntent.putExtra("imageRes", itemsData[position].getImageUrl());
                // 製作成 Material Design 需要的 ActivityOptionsCompat
                ActivityOptionsCompat options = ActivityOptionsCompat.makeSceneTransitionAnimation((Activity) mContext, imagePair);
                ActivityCompat.startActivity((Activity) mContext, transitionIntent, options.toBundle());
            }
        });
裡面的tImage是連接 secondActivity.java 裡面imageView的key


完成!


完整程式碼就不一一張貼了,詳情請見Demo:


Android元件 ─ RecyclerView、Item點擊事件 onClick

前言:

如果你是要找像是ListView的setOnItemClickListener 可以看我的這篇。

Android方法(RecyclerView) — RecyclerView外接到activity點擊事件

我的Android年齡實在很短,在我接觸Android的時候,已經是RecyclerView和ListView並存的時候了。

簡而言之RecyclerView的回收機制和各種都趨近完善,比ListView強大很多。
RecyclerView最大的好處就是各種強大的排版方式。

RecylerView在使用上多了幾項必須的東西。
必須而外創建LinearManager ,這可以幫助你不用一直findViewById節省不必要的資源。
ViewHolder也變成強制必須加上的方法。


完全程式碼:

免不了的import

//主要是這一個
compile 'com.android.support:recyclerview-v7:25.2.0'
//這個是網路下載圖片的IMPORT
 compile 'com.github.bumptech.glide:glide:3.7.0'

我是使用Gidle在讀取圖片:


第一件事情是給權限,我在RecyclerView內的圖片是網路下載
<uses-permission android:name="android.permission.INTERNET"/>

此次動到的xml and java


在 res/value/drawable 內丟一張讀取中(loading)要使用到的圖片

activity_main.xml

<?xml version="1.0" encoding="utf-8"?>
<RelativeLayout xmlns:android="http://schemas.android.com/apk/res/android"
    xmlns:tools="http://schemas.android.com/tools"
    android:id="@+id/activity_main"
    android:layout_width="match_parent"
    android:layout_height="match_parent"
    android:paddingBottom="@dimen/activity_vertical_margin"
    android:paddingLeft="@dimen/activity_horizontal_margin"
    android:paddingRight="@dimen/activity_horizontal_margin"
    android:paddingTop="@dimen/activity_vertical_margin"
    tools:context="com.chat.a015865.pointoforigin.MainActivity">

 <android.support.v7.widget.RecyclerView
     android:id="@+id/recycler_view"
     android:layout_width="match_parent"
     android:layout_height="match_parent"/>
</RelativeLayout>


item.xml

<LinearLayout xmlns:android="http://schemas.android.com/apk/res/android"
    android:layout_width="match_parent"
    android:layout_height="100dp"
    android:orientation="horizontal">

    <ImageView
        android:id="@+id/image_view"
        android:layout_width="100dp"
        android:layout_height="100dp"
        android:layout_margin="5dp" />

    <TextView
        android:id="@+id/text_view"
        android:layout_width="wrap_content"
        android:layout_height="wrap_content"
        android:layout_gravity="center_horizontal"
        android:text="hello" />
</LinearLayout>

MainActivity.java

    
public class MainActivity extends AppCompatActivity {
private RecyclerView mRecyclerView;
    private RecyclerViewAdapter mRecyclerViewAdapter;
    private Context mContext;
    private String[] urlList;
   private ItemData[] itemsData;

    @Override
    protected void onCreate(Bundle savedInstanceState) {
        super.onCreate(savedInstanceState);
        setContentView(R.layout.activity_main);
        mContext = this;
        initView(); //設定View  (Eg:findViewById)
        initSet(); //設定功能 (Eg:setAdapter)
        initListener(); //設定點擊 (eg:onClick)
    }
    private void initListener(){

    }

    private void initView() {
        mRecyclerView = (RecyclerView) findViewById(R.id.recycler_view);
    }

    private void initSet() {
        setData();
        mRecyclerViewAdapter = new RecyclerViewAdapter(mContext);
        LinearLayoutManager llm = new LinearLayoutManager(this);
        llm.setOrientation(LinearLayoutManager.VERTICAL);
        mRecyclerView.setLayoutManager(llm);
        mRecyclerView.setAdapter(mRecyclerViewAdapter);
        mRecyclerViewAdapter.upData(itemsData);
    }

    private void setData() {
        urlList = new String[]{
                "http://www.jrtstudio.com/sites/default/files/ico_android.png",
                "https://pbs.twimg.com/profile_images/616076655547682816/6gMRtQyY.jpg",
                "http://cdn.bgr.com/2012/11/android-icon.jpg?quality=98&strip=all",
                "http://www.fastbooting.com/uploads/5/5/9/9/55994511/1474140_orig.png",
                "http://www.pendidikan-diy.go.id/dinas_v4/img/up_down/Android.png",
        };
        itemsData = new ItemData[]{
                new ItemData("abc", urlList[0]),
                new ItemData("defaf", urlList[1]),
                new ItemData("erhrh", urlList[2]),
                new ItemData("GDERGE", urlList[3]),
                new ItemData("EGER", urlList[4]),
                new ItemData("QHRE", urlList[0]),
                new ItemData("QEHE", urlList[1]),
                new ItemData("RTHRT", urlList[2]),
                new ItemData("YJTEY", urlList[3]),
                new ItemData("RGEW", urlList[4])
        };
    }
}

RecyclerViewAdapter.java

/**
 * Created by 015865 on 2017/3/13.
 */

public class RecyclerViewAdapter extends RecyclerView.Adapter {

    private ItemData[] itemsData;
    private Context mContext;

    public RecyclerViewAdapter(Context context) {
        mContext = context;
    }

    public void upData(ItemData[] item) {
        itemsData = item;
        notifyDataSetChanged();

    }

    public class MyHolder extends RecyclerView.ViewHolder {
        private ImageView mImageView;
        private TextView mTextView;

        public MyHolder(View itemView) {
            super(itemView);
            mImageView = (ImageView) itemView.findViewById(R.id.image_view);
            mTextView = (TextView) itemView.findViewById(R.id.text_view);
        }
    }

    @Override
    public RecyclerViewAdapter.MyHolder onCreateViewHolder(ViewGroup parent, int viewType) {
        View view = LayoutInflater.from(parent.getContext()).inflate(R.layout.item, parent, false);
        MyHolder mh = new MyHolder(view);
        return mh;
    }

    @Override
    public void onBindViewHolder(RecyclerViewAdapter.MyHolder holder, int position) {
        Glide.with(mContext).load(itemsData[position].getImageUrl())
                .error(R.drawable.ico_android)
                .placeholder(R.drawable.tool)
                .into(holder.mImageView);
        holder.mTextView.setText(itemsData[position].getTitle());
    }

    @Override
    public int getItemCount() {
        return itemsData == null ? 0 : itemsData.length;
    }
}

ItemData.java

public class ItemData {
    private String title;
    private String imageUrl;

    public ItemData(String title, String imageUrl) {
        this.title = title;
        this.imageUrl = imageUrl;
        Log.d("ItemData", "CheckPoint imageUrl=" + imageUrl);
    }

    public String getTitle() {
        return title;
    }

    public String getImageUrl() {
        return imageUrl;
    }

    public void setTitle(String title) {
        this.title = title;
    }

    public void setImageUrl(String imageUrl) {
        this.imageUrl = imageUrl;
    }
}


更新(2017/03/14)
RecyclerView的點擊事件item

重點程式碼:

首先先做出RecyclerView每個Item的點擊事件。
兩個地方需要更改!

我們從MyHolder下去著手。

RecyclerViewAdapter.java

1、MyHolder讓每個hold住的畫面都有點擊事件
 public class MyHolder extends RecyclerView.ViewHolder {
        private ImageView mImageView;
        private TextView mTextView;
        private View view;

        public MyHolder(View itemView) {
            super(itemView);
            view = itemView;
            mImageView = (ImageView) itemView.findViewById(R.id.image_view);
            mTextView = (TextView) itemView.findViewById(R.id.text_view);
        }

        public void setOnItemClick(View.OnClickListener l) {
            this.view.setOnClickListener(l);
        }
    }

2、再從onBindViewHolder下手,設定每個點擊事件要做的事情
 
 @Override
    public void onBindViewHolder(final RecyclerViewAdapter.MyHolder holder, final int position) {
        Glide.with(mContext).load(itemsData[position].getImageUrl())
                .error(R.drawable.loading)
                .placeholder(R.drawable.tool)
                .into(holder.mImageView);

        holder.mTextView.setText(itemsData[position].getTitle());

        holder.setOnItemClick(new View.OnClickListener() {
            @Override
            public void onClick(View v) {
              //設定你點擊每個Item後,要做的事情
   
            }
        });
    }


這就能完成每次的點擊事件。

Demo:
https://drive.google.com/open?id=0Byk75IYx-dKXR0lnZW9RQU90MDQ

網路上方式很多也超級詳細,不再贅述
小鰻:http://lp43.blogspot.tw/2014/08/recyclerviewandroid-studio.html

協程(coroutine) - 協程為什麼要學它?

 Coroutine 協程 再強調一次 協程就是由kotlin官方所提供的線程api //Thread Thread { }.start() //Executor val execu...