前言
除了ViewPager頁面的轉換,現在上面大多都還會有一個Tab。這邊使用我之前的DEMO 直接加上TabLayout
有兩篇可以先參考一下
FragmentPagerAdapter簡易使用(一)
http://nikeru8.blogspot.tw/2017/11/androidfragmentpageradapterviewpager.html
還有
簡單ViewPager頁面 banner自動擴充實現
http://nikeru8.blogspot.tw/2017/11/androidviewpager-viewpager-banner.html
上面兩個demo都可以直接配合這次的TabLayout完成!
如圖
 |
| 今日實作 |
程式碼
First –
看圖說故事。
然後打上design
看到他後把他加入Gradle內,就開始使用囉

畫面xml拉好後
<?xml version="1.0" encoding="utf-8"?>
<RelativeLayout xmlns:android="http://schemas.android.com/apk/res/android"
    xmlns:app="http://schemas.android.com/apk/res-auto"
    xmlns:tools="http://schemas.android.com/tools"
    android:layout_width="match_parent"
    android:layout_height="match_parent"
    tools:context="com.hello.kaiser.fragment.MainActivity">

    <android.support.design.widget.TabLayout
        android:id="@+id/view_tab"
        android:layout_width="match_parent"
        android:layout_height="44dp" />

    <android.support.v4.view.ViewPager
        android:id="@+id/view_pager"
        android:layout_width="match_parent"
        android:layout_height="match_parent"
        android:layout_below="@+id/view_tab"
        android:background="@android:color/darker_gray" />

</RelativeLayout>
設定一下元件 findViewById
    private TabLayout mTab;
    mTab = (TabLayout) findViewById(R.id.view_tab);
讓我們來加入Tab吧
 mTab.addTab(mTab.newTab().setText("第一頁"));
 mTab.addTab(mTab.newTab().setText("第二頁"));
這就可以在上方產生兩個Tab
然後要讓ViewPager滑動時,上方Tab跟著滑動
mViewPager.addOnPageChangeListener(new TabLayout.TabLayoutOnPageChangeListener(mTab));
除了滑動之外
點擊Tab,下方的ViewPager當然也要有所動作
mTab.addOnTabSelectedListener(new TabLayout.ViewPagerOnTabSelectedListener(mViewPager));
最簡單的使用方式就完成囉
如果你還想要再按下Tab時候,有額外的事件發生
可以設定她的監聽Listener
mTab.addOnTabSelectedListener(new TabLayout.OnTabSelectedListener() {
            @Override
            public void onTabSelected(TabLayout.Tab tab) {
            }

            @Override
            public void onTabUnselected(TabLayout.Tab tab) {

            }

            @Override
            public void onTabReselected(TabLayout.Tab tab) {

            }
        });
簡單的方式大致上就這樣
這邊再講一個新增Tab的方法
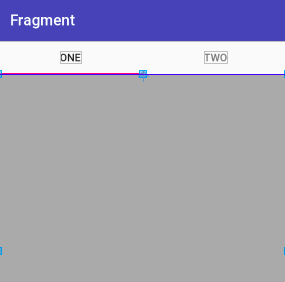
可以在xml直接上TabItem
<android.support.design.widget.TabLayout
        android:id="@+id/view_tab"
        android:layout_width="match_parent"
        android:layout_height="44dp">

        <android.support.design.widget.TabItem
            android:id="@+id/one"
            android:layout_width="wrap_content"
            android:layout_height="wrap_content"
            android:text="one" />

        <android.support.design.widget.TabItem
            android:id="@+id/two"
            android:layout_width="wrap_content"
            android:layout_height="wrap_content"
            android:text="two" />

    </android.support.design.widget.TabLayout>
和ViewPager連動的部分運用上面的code在做連動app:tabIndicatorColor :指示條的顏色
app:tabIndicatorHeight :指示條的高度
app:tabSelectedTextColor : tab被選中時的字體顏色
app:tabTextColor : tab未被選中時的字體顏色
app:tabMode="scrollable" : 默認是fixed:固定的,標籤很多時候會被擠壓,不能滑動。
增加Tab的部分,這邊介紹了兩種,個人覺得使用代碼的方式呈現比較好,因為後台如果要新增Tab,這樣又要再xml上新增TabItem。
如果使用代碼呈現,可以用for迴圈讓Tab的數量隨著後台的要求成長!
可能發生的問題
在普通的手機上都很正常,如果你在平板上造正常步驟設置妳的TabLayout會有跑版問題,字體會往中間集中,下方那條指示器indicator也會變得很短。
在我百思不得其解下Rick大神解決了我的困難,在此歌頌一下師傅。
在xml內設置
  <android.support.design.widget.TabLayout
       ...
        app:tabGravity="fill"
        app:tabMaxWidth="0dp"
       ...
        />
建議在使用TabLayout時都把這兩個加上,在平板上就不會跑版了。感恩Seafood!讚嘆Seafood!
DEMO
https://github.com/nikeru8/FragmentPagerAdapterDemo/tree/addTabLayout
文獻:
http://www.jianshu.com/p/be1e8a1da639
http://givemepass-blog.logdown.com/posts/288943-how-to-use-tablayout


沒有留言:
張貼留言