前言
之前寫了一個簡單的
ViewPager範本。
簡單ViewPager頁面 banner自動擴充實現
http://nikeru8.blogspot.tw/2017/11/androidviewpager-viewpager-banner.html
這篇偏向
Banner
現在寫的
FragmentPagerAdapter偏向頁面的使用方式
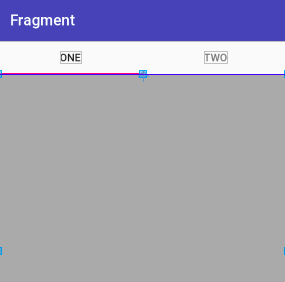
如下圖
重點程式碼
step one — FragmentPagerAdapter建構
先來看
Adapter的部分
FragmentPagerAdapter
需要有幾個方法要複寫
 //必要建構子
    public adapter(FragmentManager fm) {
        super(fm);
    }

    //你想要顯示的Fragment
    @Override
    public Fragment getItem(int position) {
        return null;
    }

    //要顯示的筆數
    @Override
    public int getCount() {
        return 0;
    }
step two – Fragment
再來就是
Fragment的部分
在開始前,先來看一下Fragment的生命週期
在這邊我們可以複寫
onCreate、
onCreateView
並創建
newInstance
newInstance可以自動創建
public static FragmentSingle newInstance() {
        //這邊設計呼叫Fragment的方式,Bundle內可以從activity > adapter 帶參數過來
        Bundle args = new Bundle();
        FragmentSingle fragment = new FragmentSingle();
        fragment.setArguments(args);
        return fragment;
    }
newInstance使用
Bundle接參數帶入
fragment。
在
onCreate的地方真正的把參數帶到
fragment內
 //繼承fragment後,直接打newInstance會自動生成此方法,裡面都幫你建置好Bundle類了
    public static CreateFragment newInstance(int showType, String content) {
        //Bundle接收傳過來的參數
        Bundle args = new Bundle();
        args.putInt("showType", showType);
        args.putString("content", content);
        CreateFragment fragment = new CreateFragment();
        fragment.setArguments(args);
        return fragment;
    }

    @Override
    public void onCreate(@Nullable Bundle savedInstanceState) {
        super.onCreate(savedInstanceState);
        //帶入參數
        showType = getArguments().getInt("showType");
        content = getArguments().getString("content");
    }
接下來還要複寫兩種方法
onCreateView 和
onViewCreated
onCreateView:用來創建
Layout xml的,你想創建什麼型態的xml也可以設定在這裡,有在上方圖片的生命週期內
onViewCreated:用來取得參數,理所當然的這個方法就會在onCreateView之後,使用
getView()這個方法取得
xml內的
id
這邊舉個
onViewCreated的使用
@Override
public void onViewCreated(View view, @Nullable Bundle savedInstanceState) {
    super.onViewCreated(view, savedInstanceState);
    TextView message = getView().findViewById(R.id.item_one);
    message.setText(content);
}
大致上這樣。
這邊說明一下比較妥當的使用時機。
我是希望程式碼已不攏長,可讀性為主,所以可以的話,讓頁面長的雷同的地方再使用會比較好。
舉個例子:
像是這個App這頁面,有著高相似性的頁面,使用這方法就會是上上之選。
STEP THREE –
Fragment寫好後可以把它塞入
Adapter內了
public class CustomFragmentAdapter extends FragmentPagerAdapter {

    String mTitleOne, mTitleTwo;

    public CustomFragmentAdapter(FragmentManager fm) {
        super(fm);
    }

    public void setDataOne(String messgae) {
        //這邊你可以在activity內獲取資料,再利用getItem傳入CreateFragment
        mTitleOne = messgae;
        notifyDataSetChanged();
    }

    public void setDataTwo(String message) {
        //這邊你可以在activity內獲取資料,再利用getItem傳入CreateFragment
        mTitleTwo = message;
        notifyDataSetChanged();
    }

    @Override
    public Fragment getItem(int position) {
        //創作每一個Fragment內的內容
        if (position == 0) {//第一頁
            return new CreateFragment().newInstance(position, mTitleOne);
        } else {//第二頁
            return new CreateFragment().newInstance(position, mTitleTwo);
        }
    }

    @Override
    public int getCount() {
        //你得Fragment頁面數
        return 2;
    }
}
說明我寫在方法的上方。
此時你會看到我多寫了兩個方法
setDataOne和
setDataTwo
如果你兩個頁面的內容相差很多,要帶入不同的參數進去,可以使用這個方法和
Activity要資料,在
getItem內
new不同的
Fragment把資料帶進去。
當然你也可以直接寫在
Adapter建構子內直接取值,但如果之後需要刷新
fragment內的資料就要重新
new一個
Adapter,不是很聰明的作法。
完整程式碼
今日會動到的地方
簡單一個ViewPager
 |
| activity_main.xml |
activity_main.xml
<?xml version="1.0" encoding="utf-8"?>
<RelativeLayout xmlns:android="http://schemas.android.com/apk/res/android"
    xmlns:app="http://schemas.android.com/apk/res-auto"
    xmlns:tools="http://schemas.android.com/tools"
    android:layout_width="match_parent"
    android:layout_height="match_parent"
    tools:context="com.hello.kaiser.fragment.MainActivity">

    <android.support.v4.view.ViewPager
        android:id="@+id/view_pager"
        android:layout_width="match_parent"
        android:layout_height="match_parent"
        android:background="@android:color/darker_gray" />

</RelativeLayout>
 |
| create_fragment_one.xml |
create_fragment_one.xml
你
<?xml version="1.0" encoding="utf-8"?>
<LinearLayout
    android:background="@color/colorPrimary"
    xmlns:android="http://schemas.android.com/apk/res/android"
    android:layout_width="match_parent"
    android:layout_height="match_parent"
    android:orientation="vertical">

    <TextView
        android:id="@+id/item_one"
        android:layout_width="match_parent"
        android:layout_height="wrap_content"
        android:text="one"
        android:textSize="40sp" />
</LinearLayout>
 |
| create_fragment_two.xml |
create_fragment_two.xml
<?xml version="1.0" encoding="utf-8"?>
<LinearLayout xmlns:android="http://schemas.android.com/apk/res/android"
    android:layout_width="match_parent"
    android:layout_height="match_parent"
    android:background="@color/colorAccent"
    android:orientation="vertical">

    <TextView
        android:id="@+id/item_two"
        android:layout_width="match_parent"
        android:layout_height="wrap_content"
        android:text="two"
        android:textSize="40sp" />
</LinearLayout>
畫面畫好了 來看程式碼吧
CustomFragmentAdapter.java
public class CustomFragmentAdapter extends FragmentPagerAdapter {

    String mTitleOne, mTitleTwo;

    public CustomFragmentAdapter(FragmentManager fm) {
        super(fm);
    }

    public void setDataOne(String messgae) {
        //這邊你可以在activity內獲取資料,再利用getItem傳入CreateFragment
        mTitleOne = messgae;
        notifyDataSetChanged();
    }

    public void setDataTwo(String message) {
        //這邊你可以在activity內獲取資料,再利用getItem傳入CreateFragment
        mTitleTwo = message;
        notifyDataSetChanged();
    }

    @Override
    public Fragment getItem(int position) {
        //創作每一個Fragment內的內容
        if (position == 0) {//第一頁
            return new CreateFragment().newInstance(position, mTitleOne);
        } else {//第二頁
            return new CreateFragment().newInstance(position, mTitleTwo);
        }
    }

    @Override
    public int getCount() {
        //你得Fragment頁面數
        return 2;
    }
}
CreateFragment.java
public class CreateFragment extends Fragment {

    private int showType;
    private String content;
    private Context context;

    //繼承fragment後,直接打newInstance會自動生成此方法,裡面都幫你建置好Bundle類了
    public static CreateFragment newInstance(int showType, String content) {
        //Bundle接收傳過來的參數
        Bundle args = new Bundle();
        args.putInt("showType", showType);
        args.putString("content", content);
        CreateFragment fragment = new CreateFragment();
        fragment.setArguments(args);
        return fragment;
    }

    @Override
    public void onCreate(@Nullable Bundle savedInstanceState) {
        super.onCreate(savedInstanceState);
        //帶入參數
        showType = getArguments().getInt("showType");
        content = getArguments().getString("content");
    }


    @Nullable
    @Override
    public View onCreateView(LayoutInflater inflater, @Nullable ViewGroup container, @Nullable Bundle savedInstanceState) {
        Log.d("checkpoint", "onCreateView onCreateView");
        if ("0".equals(String.valueOf(showType))) {//第一頁
            return LayoutInflater.from(context).inflate(R.layout.create_fragment_one, null);
        } else if ("1".equals(String.valueOf(showType))) {//第二頁
            return LayoutInflater.from(context).inflate(R.layout.create_fragment_two, null);
        } else {
            return null;
        }
    }

    @Override
    public void onViewCreated(View view, @Nullable Bundle savedInstanceState) {
        Log.d("checkpoint", "checkonViewCreatedpoint onViewCreated");

        super.onViewCreated(view, savedInstanceState);
        if (showType == 0) {//第一頁
            TextView message = getView().findViewById(R.id.item_one);
            message.setText(content);

        } else if (showType == 1) {//第二頁
            TextView message = getView().findViewById(R.id.item_two);
            message.setText(content);
        }
    }

    @Override
    public void onAttach(Context context) {
        super.onAttach(context);
        this.context = context;
    }
}
MainActivity.java
public class MainActivity extends AppCompatActivity {

    private ViewPager mViewPager;
    private CustomFragmentAdapter mAdapter;

    @Override
    protected void onCreate(Bundle savedInstanceState) {
        super.onCreate(savedInstanceState);
        setContentView(R.layout.activity_main);
        initView();
        initSet();
    }

    private void initView() {
        mViewPager = (ViewPager) findViewById(R.id.view_pager);
    }

    private void initSet() {
        mAdapter = new CustomFragmentAdapter(getSupportFragmentManager());
        mViewPager.setAdapter(mAdapter);
        mAdapter.setDataOne("你好第一頁");
        mAdapter.setDataTwo("歡迎光靈第二頁 hello ");
    }
}
DEMO
https://github.com/nikeru8/FragmentPagerAdapterDemo/tree/master
歡迎交流喔!
Fragment全集
Fragment的使用(一) ─ 在activity內放置Fragment
Fragment的使用(二) ─ 在activity內切換Fragment
Fragment 返回上一頁 - OnBackPressed
Fragment點擊穿透
FragmentPagerAdapter